How to track & analyze user actions
Google Analytics
YMCA Website Services uses the Drupal contrib Google Tag module to enable Google Analytics tracking on your YMCA Website Services site.
To get started, you should first create a GA4 property. Use the Analytics Help for assistance.
Configuration
Configuration is done at the Google Tag configuration page: /admin/config/services/google_tag. Add your GA4 measurement ID (beginning with G-) to connect your site to Google Analytics.
Migration from google_analytics Module
As of YMCA Website Services 11.3, the google_analytics module has been removed and replaced by the google_tag module. The google_tag module is installed automatically during the upgrade, and the google_analytics module is removed. You will need to configure your GA4 measurement ID at /admin/config/services/google_tag after upgrading.
Search Tracking with Google Analytics
Prerequisites
- Google Analytics account to track you site should be created.
- Google Tag contrib module should be enabled and configured to use existing GA account.
Steps
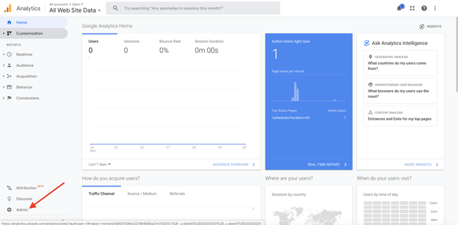
Log in to Google Analytics account that configured to track your YMCA Website Services site.
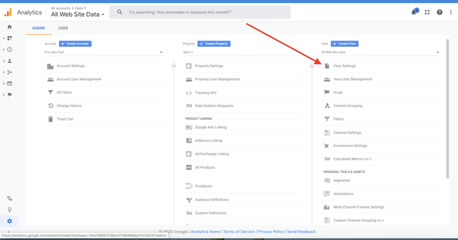
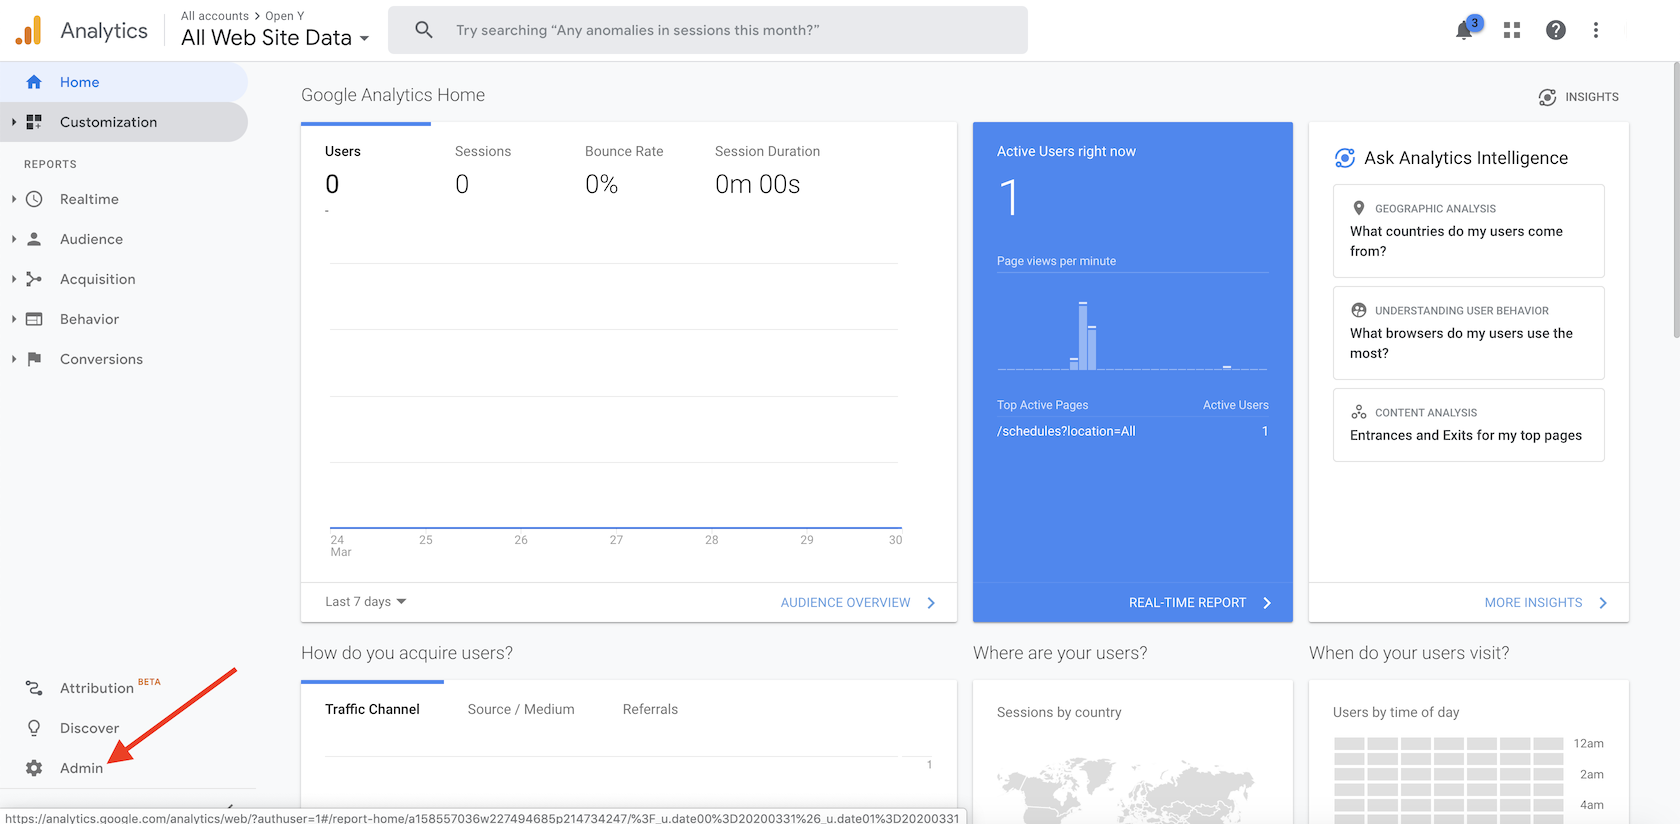
Click Admin button in bottom right corner of main screen
Click View Settings
Scroll to “Site Search Settings” section and enable “Site Search Tracking” switch
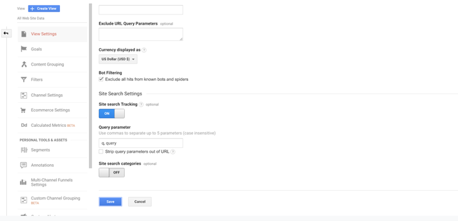
Fill query parameter field with
q, queryvalues and click SaveReports about the search tracking you can find at main screen in Behavior → Site Search Section


Attention: Data processing latency for search tracking reports is 24-48 hours (see Google’s support doc).
Data Layer
See also the Data Layer module README.
The Data Layers module output data on the page in a json format. By default it will output properties (langcode, vid, name, uid, created, status, roles) and related taxonomy for any node, user, or any route based entity.
A limited set of properties are available via the Data Layers configuration form at /admin/config/search/datalayer (langcode, vid, name, uid, created, status, roles).
Adding additional properties can be done through use of hook_datalayer_meta().
function my_module_datalayer_meta() {
  return array(
    'property',
  );
}
It will be added to the page as:
{
  "entityProperty": "whatever the value is"
}
Altering which properties will be output can be done via hook_datalayer_meta_alter().
function my_module_datalayer_meta_alter(&$properties) {
  // Override module norm in all cases.
  unset($properties['entityUid']);

  // Specific situation alteration...
  $type = false;
  if ($obj = _datalayer_menu_get_any_object($type)) {
    if ($type === 'node' && in_array(array('my_bundle', 'my_nodetype'), $obj->type)) {
      // Remove author names on some content type.
      if ($key = array_search('name', $properties)) {
        unset($properties[$key]);
      }
    }
    elseif ($type === 'my_entity_type') {
      // Remove some property on some entity type.
      if ($key = array_search('my_property', $properties)) {
        unset($properties[$key]);
      }
    }
  }
}
Adding additional data can be done using datalayer_add().
function _my_module_myevent_func($argument = FALSE) {
  if ($argument) {
    datalayer_add(array(
      'drupalMyProperty' => $argument,
      'userAnotherProperty' => _my_module_other_funct($argument),
    ));
  }
}
To alter the data to be output use hook_datalayer_alter().
function my_module_datalayer_alter(&$data_layer) {
  // Make the title lowercase on some node type.
  if (isset($data_layer['entityBundle']) && $data_layer['entityBundle'] == 'mytype') {
    $data_layer['entityLabel'] = strtolower($data_layer['entityLabel']);
  }
}
Cross-domain Tracking
This configuration enables cross-domain tracking (also known as “cross-domain measurement”) to work through internal redirects like those in
Membership Calculator (that use TrustedRedirectResponse).
When enabled, cookies matching any configured tag will be added to any redirect destination matching a configured domain. For example, a redirect to https://example.com will be transformed to https://example.com/?_gl=.....
This process is illustrated well by Analytics Mania:

Analytics provides code that does this automatically with standard <a> links, but this module is required to enable similar functionality with “server-side” links/redirects.
NOTE: Configuration and testing of analytics is required outside the scope of this module, refer to [GA4] Set up cross-domain measurement for more information.
Successful cross-domain tracking also requires the destination application to retain the passed query strings and load them into the corresponding tracking property.
Requesting cross-domain tracking support
Many Customer Relation Management (CRM) systems and Member Management Systems integrate with YMCA websites. Those systems often need guidance on hwo to maintain cross-domain tracking support.
Entrance to the CRM/MMS often involves multiple redirects which may drop the required query strings.
When discussing cross-domain support with your vendor, we recommend requesting:
Please support passing query strings/parameters through redirects, specifically maintaining the
_glparameter.
You may also need to request that your GTM/GA code be added to the CRM/MMS to report back these parameters.
Configuration
- Enable the “YMCA Website Services Cross-domain Tracking (XDT)” module at Administration > Extend, or via drush:
drush en openy_xdt - Configure the module at Administration > YMCA Website Services > Settings > Cross-domain Tracking Settings (
/admin/openy/settings/xdt)- The cookie defaults to the standard for GA4, but can be modified for use with different systems.
- The module will not have any effect until a domain is configured. Add the domains of any external sites where you would like to enable tracking.