The distribution has two methods for informing visitors of membership options and driving them to the member management system for sign-up
This is the multi-page printable view of this section. Click here to print.
Membership
Guide prospective members through the join process.
1 - Membership Calculator
This simple application provides an interactive “membership wizard” with location and pricing options to attract members. It is the default membership experience.
The Membership Calculator is bundled with the distribution in the
openy_calc module.
As of August 2024, the Membership Calculator has an updated design with improved functionality and user experience. The improved design will also respond to the selected colorway and page styles.
Configuring the Calculator
The Membership Calculator uses Membership content items. Those will need to be created in order for the Membership Calculator to function.
First, create a Membership node for each membership type your Branch or Association offers. Then, inside each Membership node, add a Membership Info Paragraph with the details of that membership at each of your Locations.
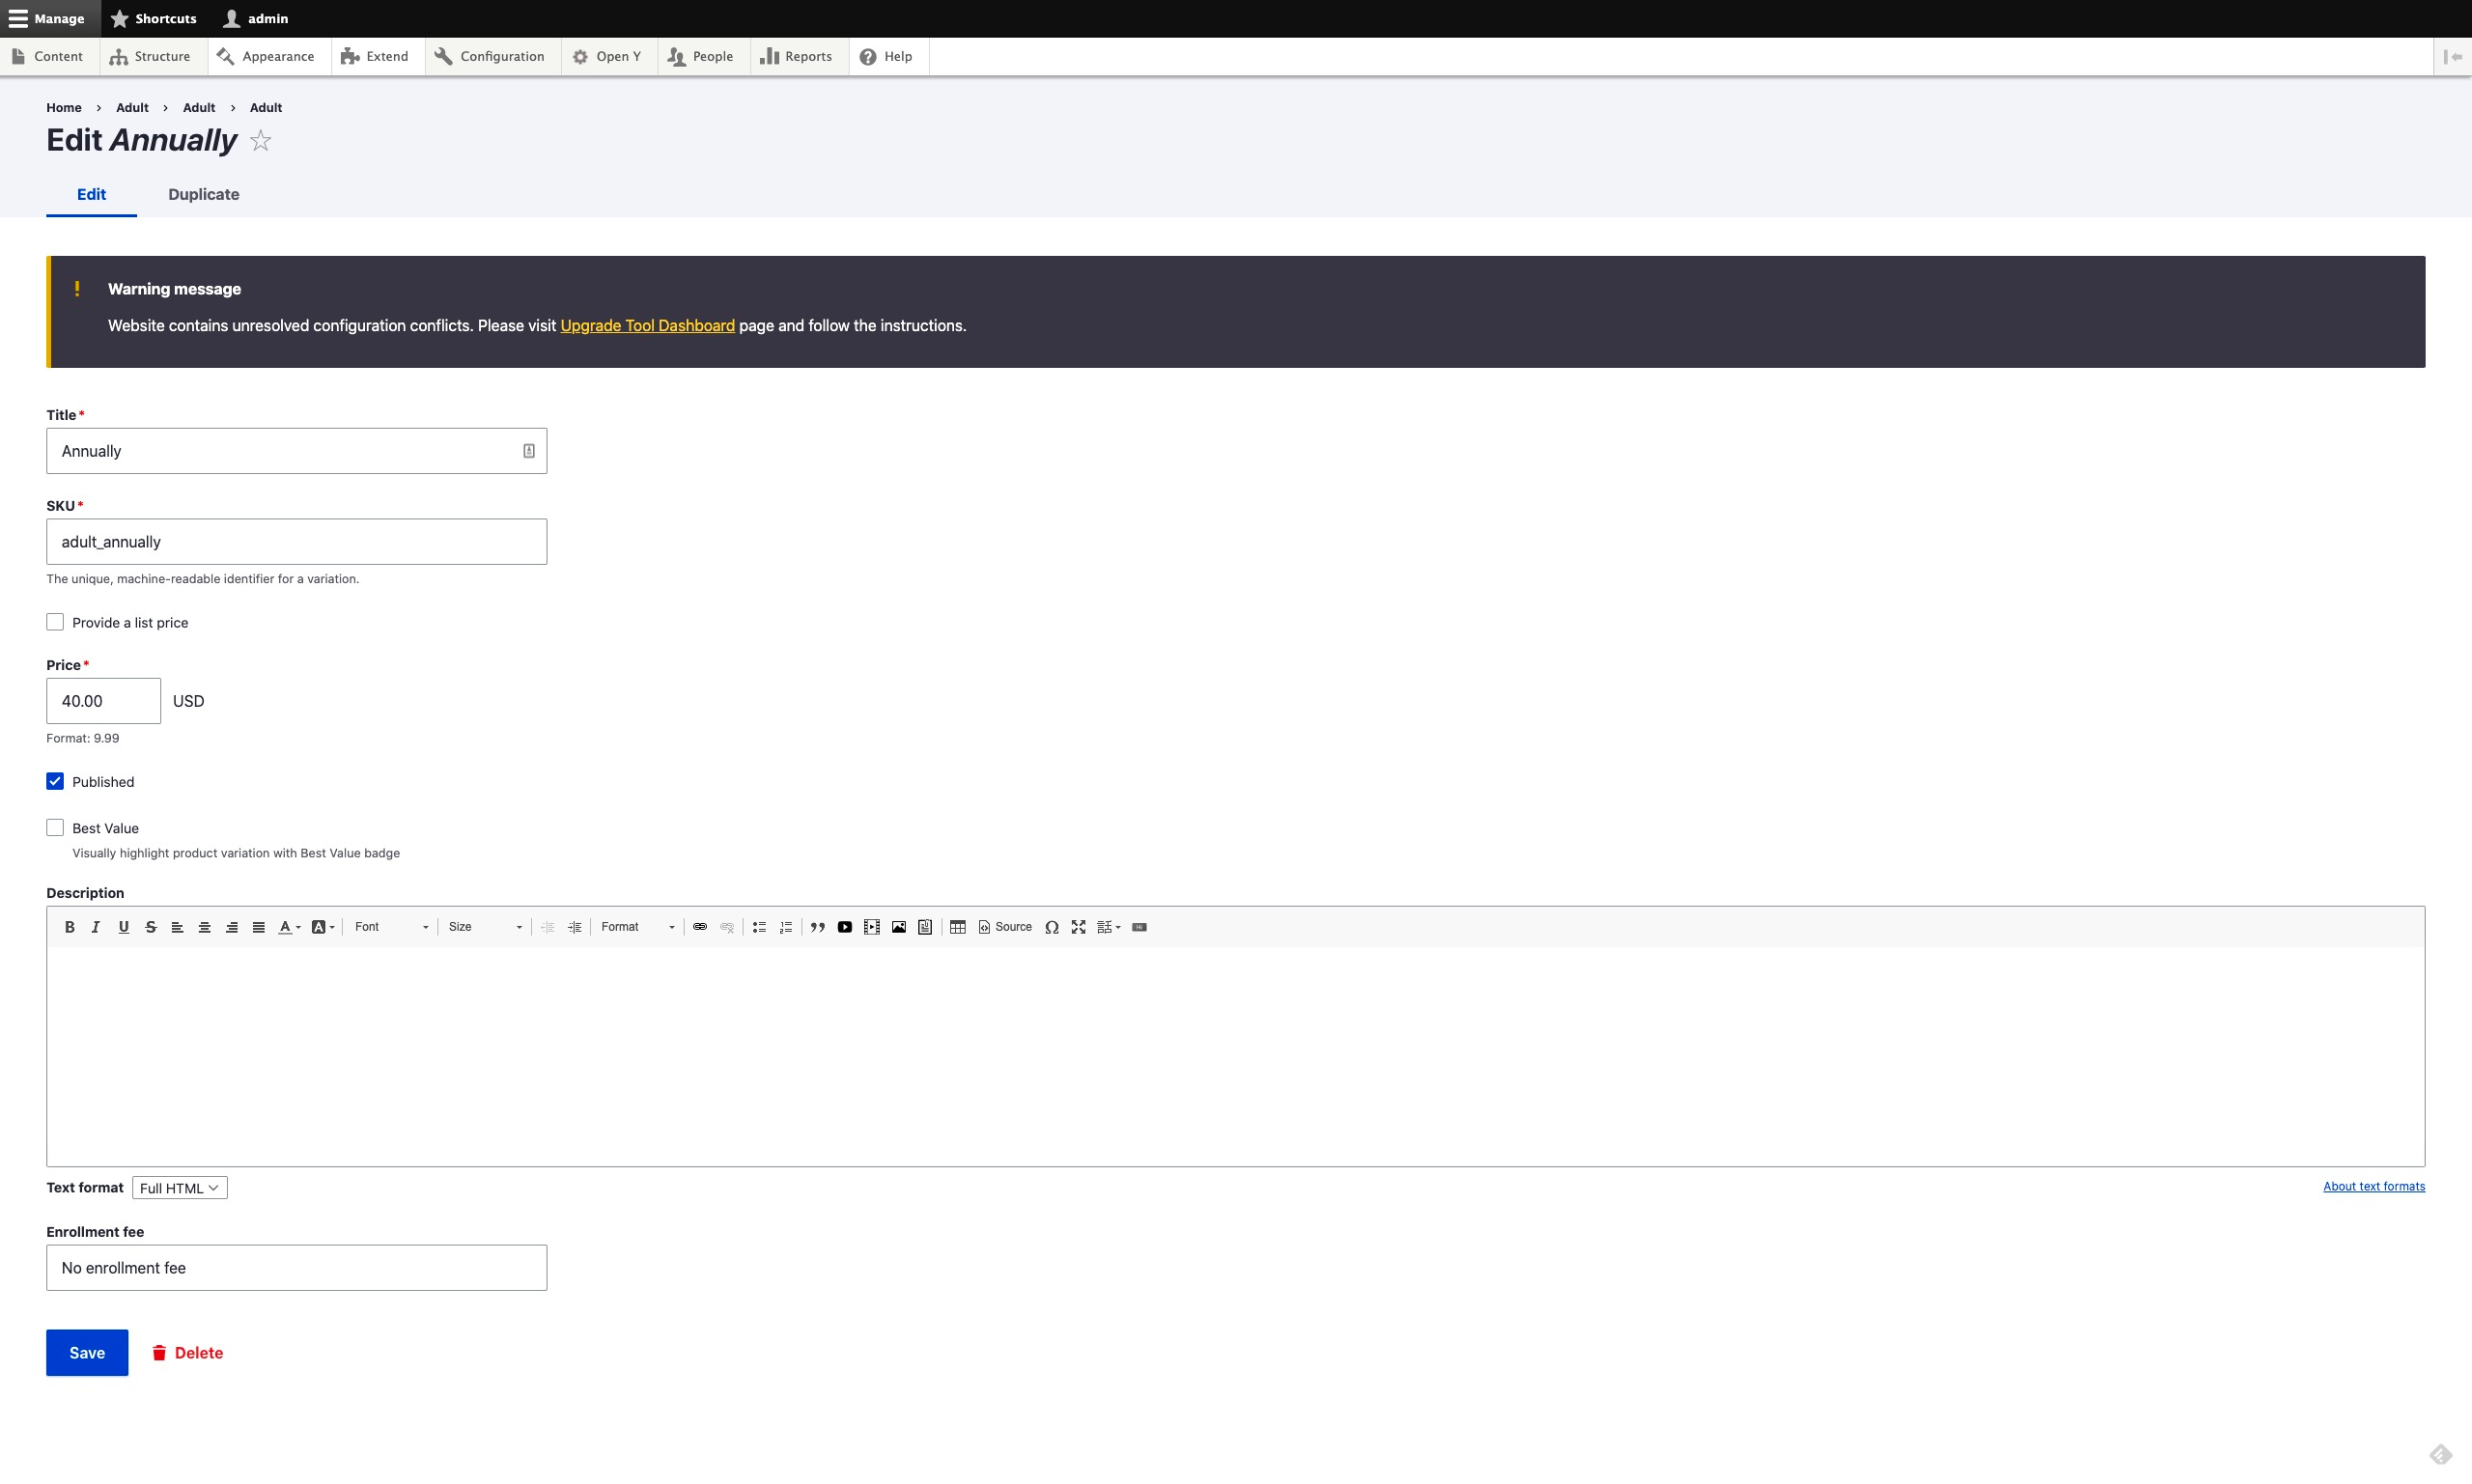
The Membership Calculator is a three-step process:
- Membership Type
- Primary Location
- Summary
Membership Type
This step lists the Title, Image, and Description of each published Member node.
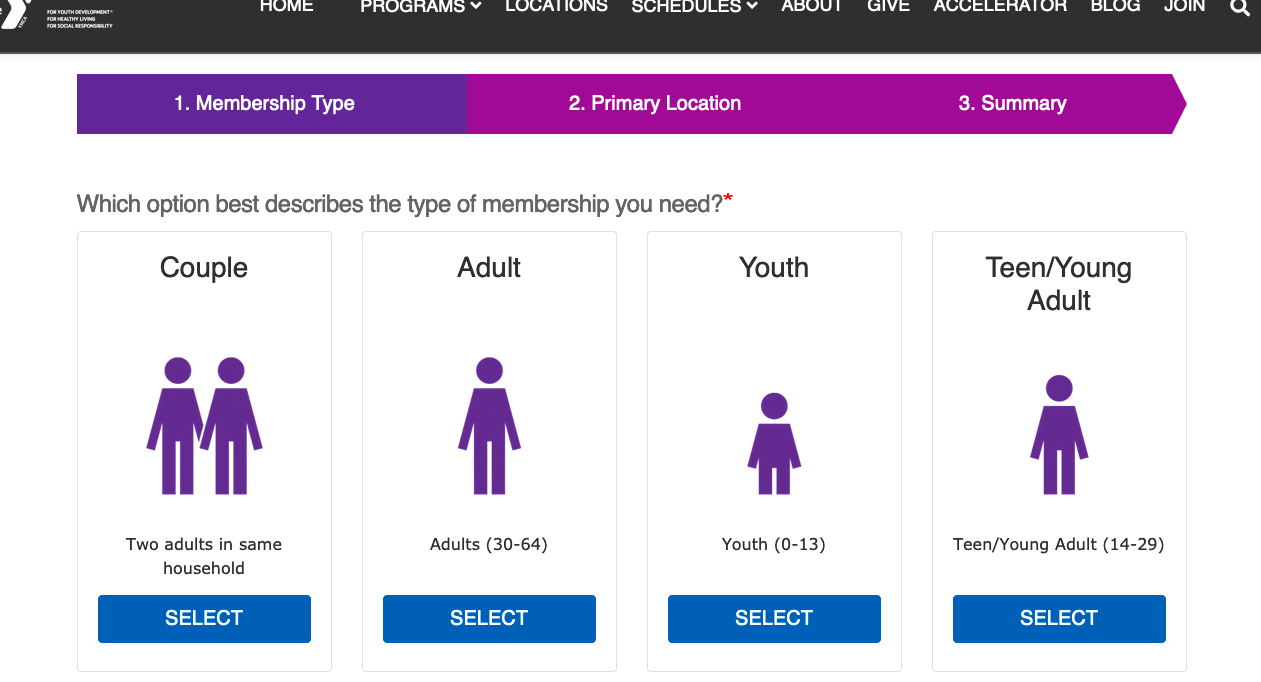
Primary Location
This step provides a map with radio buttons for the member to select their primary location. Every location listed in the YMCA Website Services Location Filter Settings (see Troubleshooting section below) is listed.
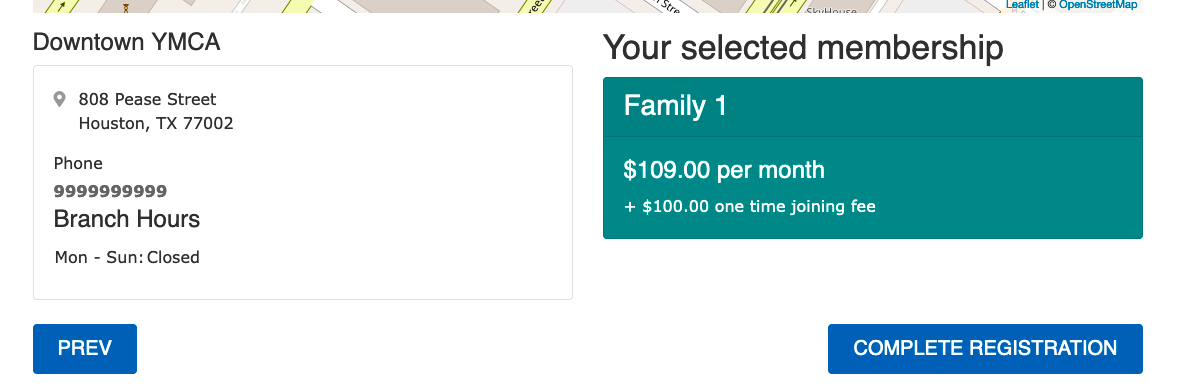
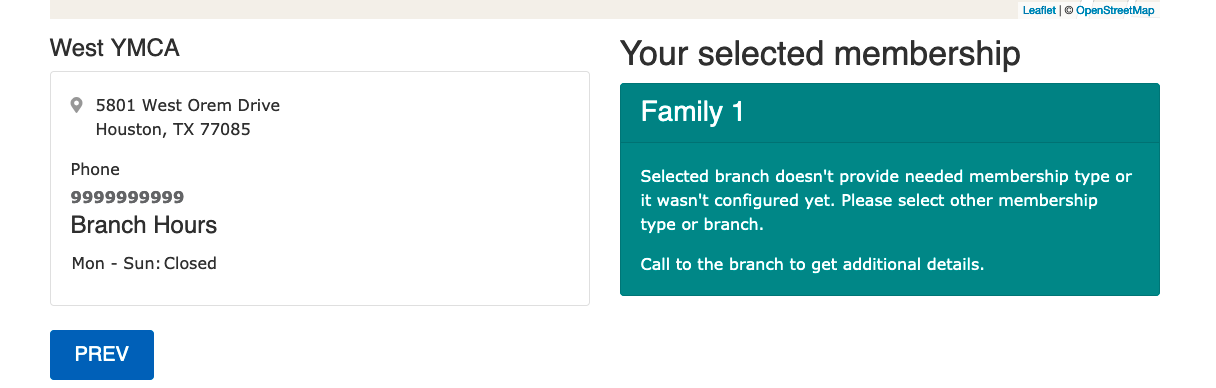
Summary
This page provides a link for the member to continue their registration, or a message indicating the selected membership is not provided at the selected location.
Location Filtering
As of version 10.4.0.0, the Membership Calculator automatically excludes unpublished Branch locations from the location selector and pricing calculations.
Impact:
- Only published Branch content appears in the Primary Location step
- Pricing calculations only include rates from published locations
- Unpublished branches (e.g., temporarily closed for renovations) won’t appear in the calculator
To control location visibility:
- Navigate to Content > Locations (
/admin/content?type=branch) - Publish or Unpublish Branch locations as needed
- Changes take effect immediately (may require cache clear:
drush cr)
For more details, see the 10.4.0.0 release notes.
Placing the Calculator on a page
Once configured, the Membership Calculator can be placed on a page using:
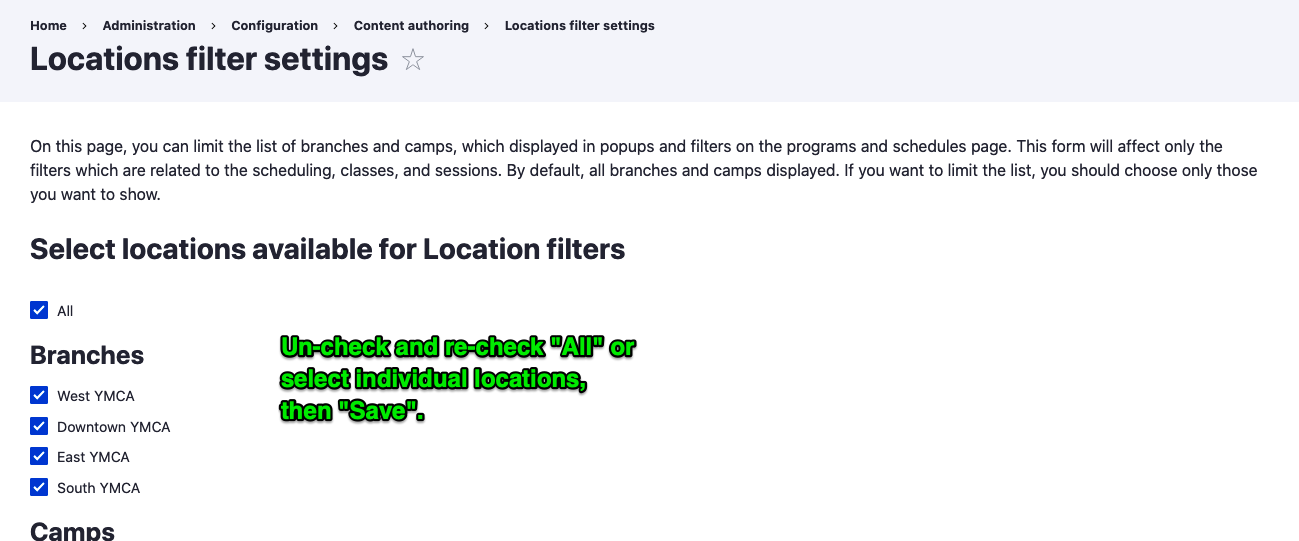
Troubleshooting
On some sites, the second step of the Membership Calculator may not show any locations. In order to resolve this, visit Administration > YMCA Website Services > Settings > YMCA Website Services Location Filter Settings and ensure that any Branches you want to use in the location search are checked.
2 - Membership Framework
This application is built on Drupal Commerce and provides advanced options for building a membership journey.
The Membership Framework is distributed in the
openy_memberships repository and must be
added and installed on top of the base distribution. We recommend working with your development partner if you wish to go this route.
Check out the Membership Framework sandboxes for a demonstration.
Membership Landing Pages
To get started with the Membership Framework you will first need to create a number of landing pages.
The examples below use Paragraphs, but similar pages can be created using Layout Builder blocks and the Membership Framework custom block.
Membership Builder
- Go to
/node/add/landing_page - Title: Membership Builder
- Layout: Two Columns with left sidebar
- Header Area: add “Small banner” paragraph and fill the fields
- Content area: add “Memberships” paragraph (it has pre-filled fields)
- Sidebar Area: add “Block Container” paragraph with “Memberships Desktop Sidebar” skin
- Block_ref: choose “Paragraph container” with “Memberships Menu Container” title
- Sidebar Area: add “Simple content” with “Memberships Button” skin and link to builder in content:
<p><a class="btn btn-primary" href="/membership-builder"><span class="text">JOIN THE Y</span></a></p>
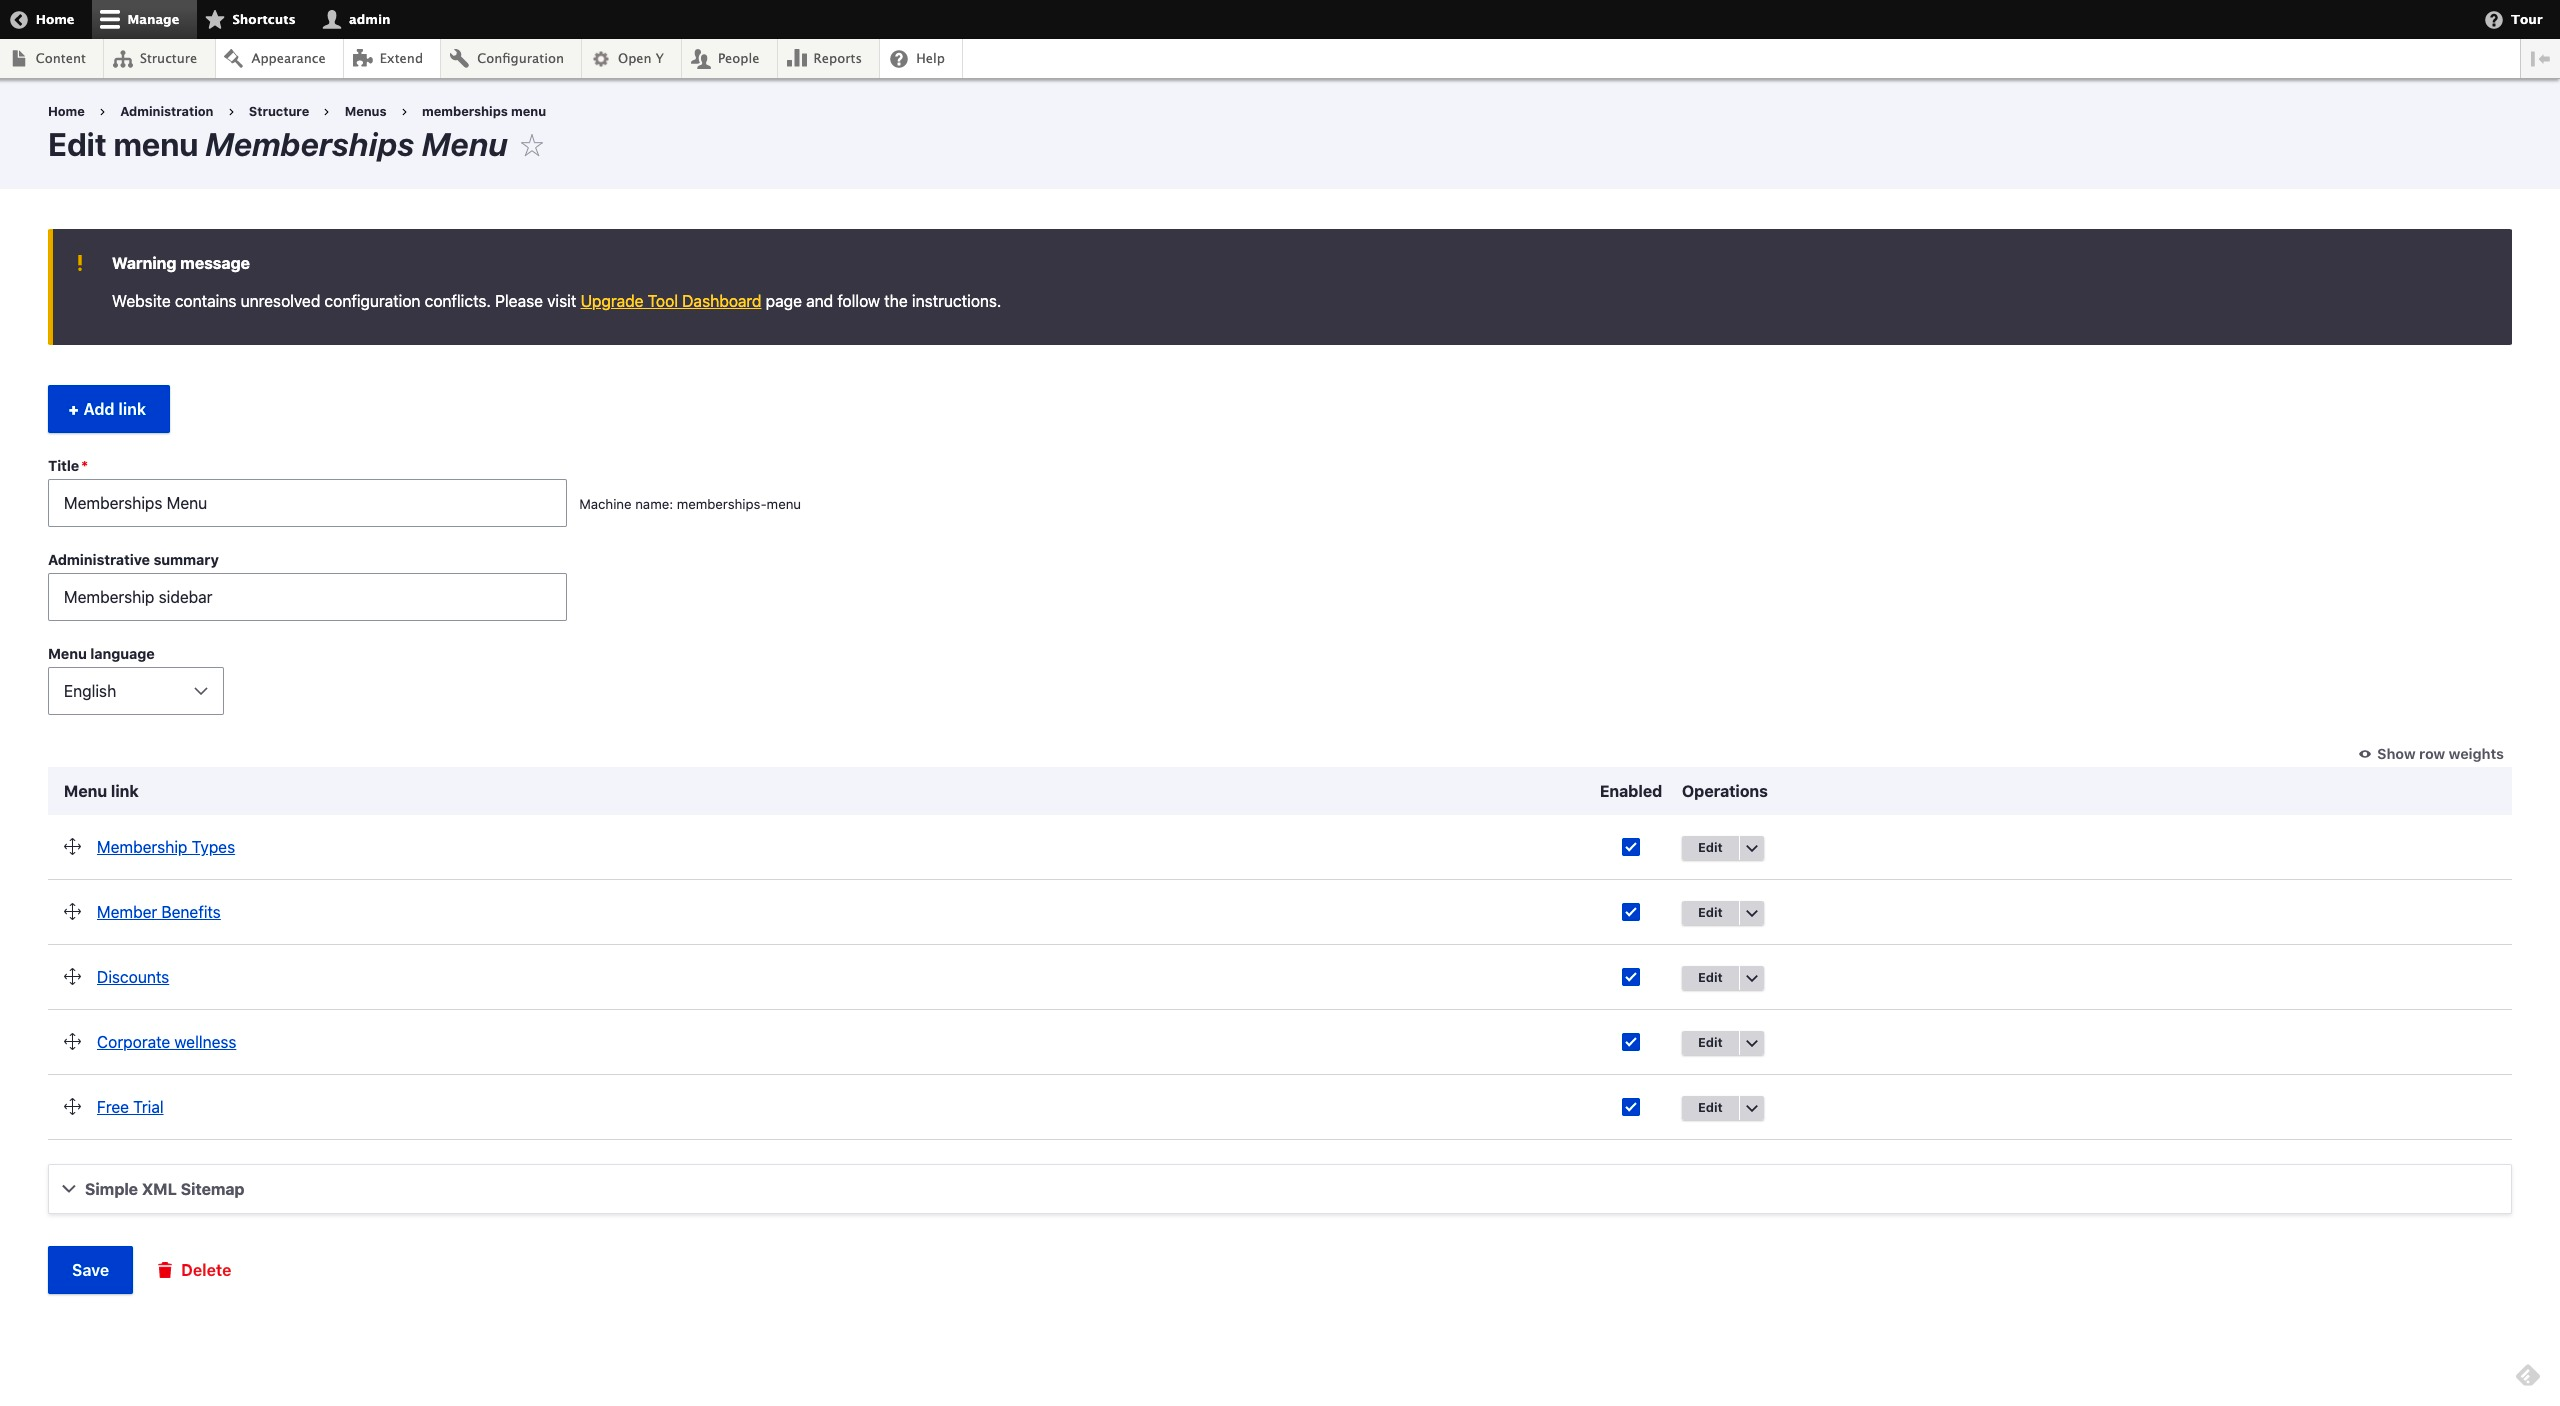
- Sidebar Area: add “Sidebar Menu” with “Memberships Sidebar Menu” skin to create your Memberships Menu with these items:
- Membership Types
- Member Benefits
- Discounts
- Corporate wellness
- Free Trial
- Sidebar Area: add “Block container” with “Memberships Feature card” skin. Use “Feature Card” block type with any content allowed in this block
- Save the landing page
Membership Types
- Go to
/node/add/landing_page - Title: Membership Types
- Layout: Two Columns with left sidebar
- Header Area: add “Small banner” paragraph and fill the fields
- Content Area:
- add “Simple content” paragraph with “Membership Simple Content” skin and text
- add “Membership Types Listing” with “Membership Types” skin
- Sidebar Area: follow the same steps for “Membership Builder” page
- Save the landing page
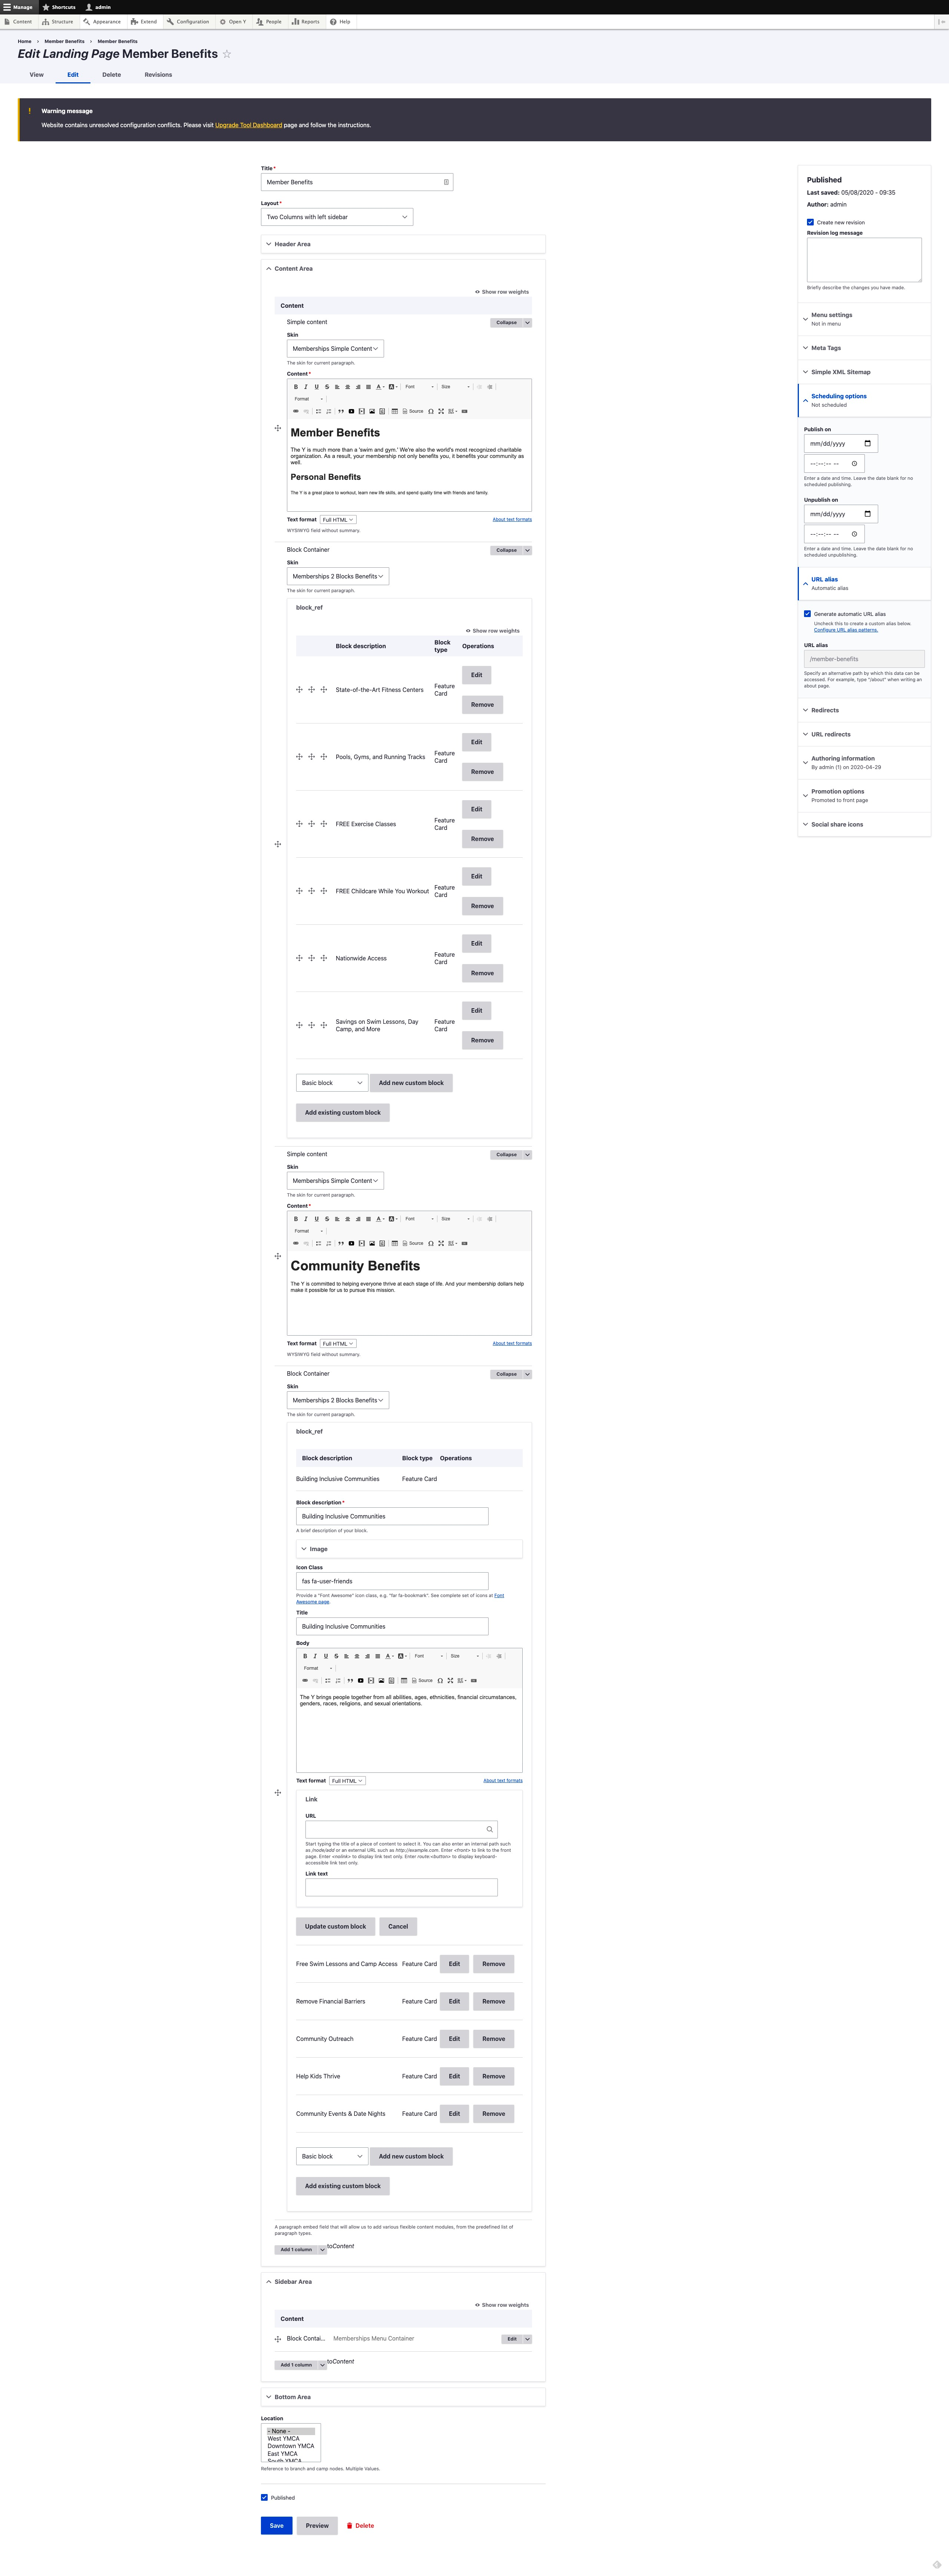
Member Benefits
- Go to
/node/add/landing_page - Title: Membership Types
- Layout: Two Columns with left sidebar
- Header Area: add “Small banner” paragraph and fill the fields
- Content Area: fill the area with content. An example is shown in the next screenshot
- Sidebar Area: follow the same steps for “Membership Builder” page
- Save the landing page
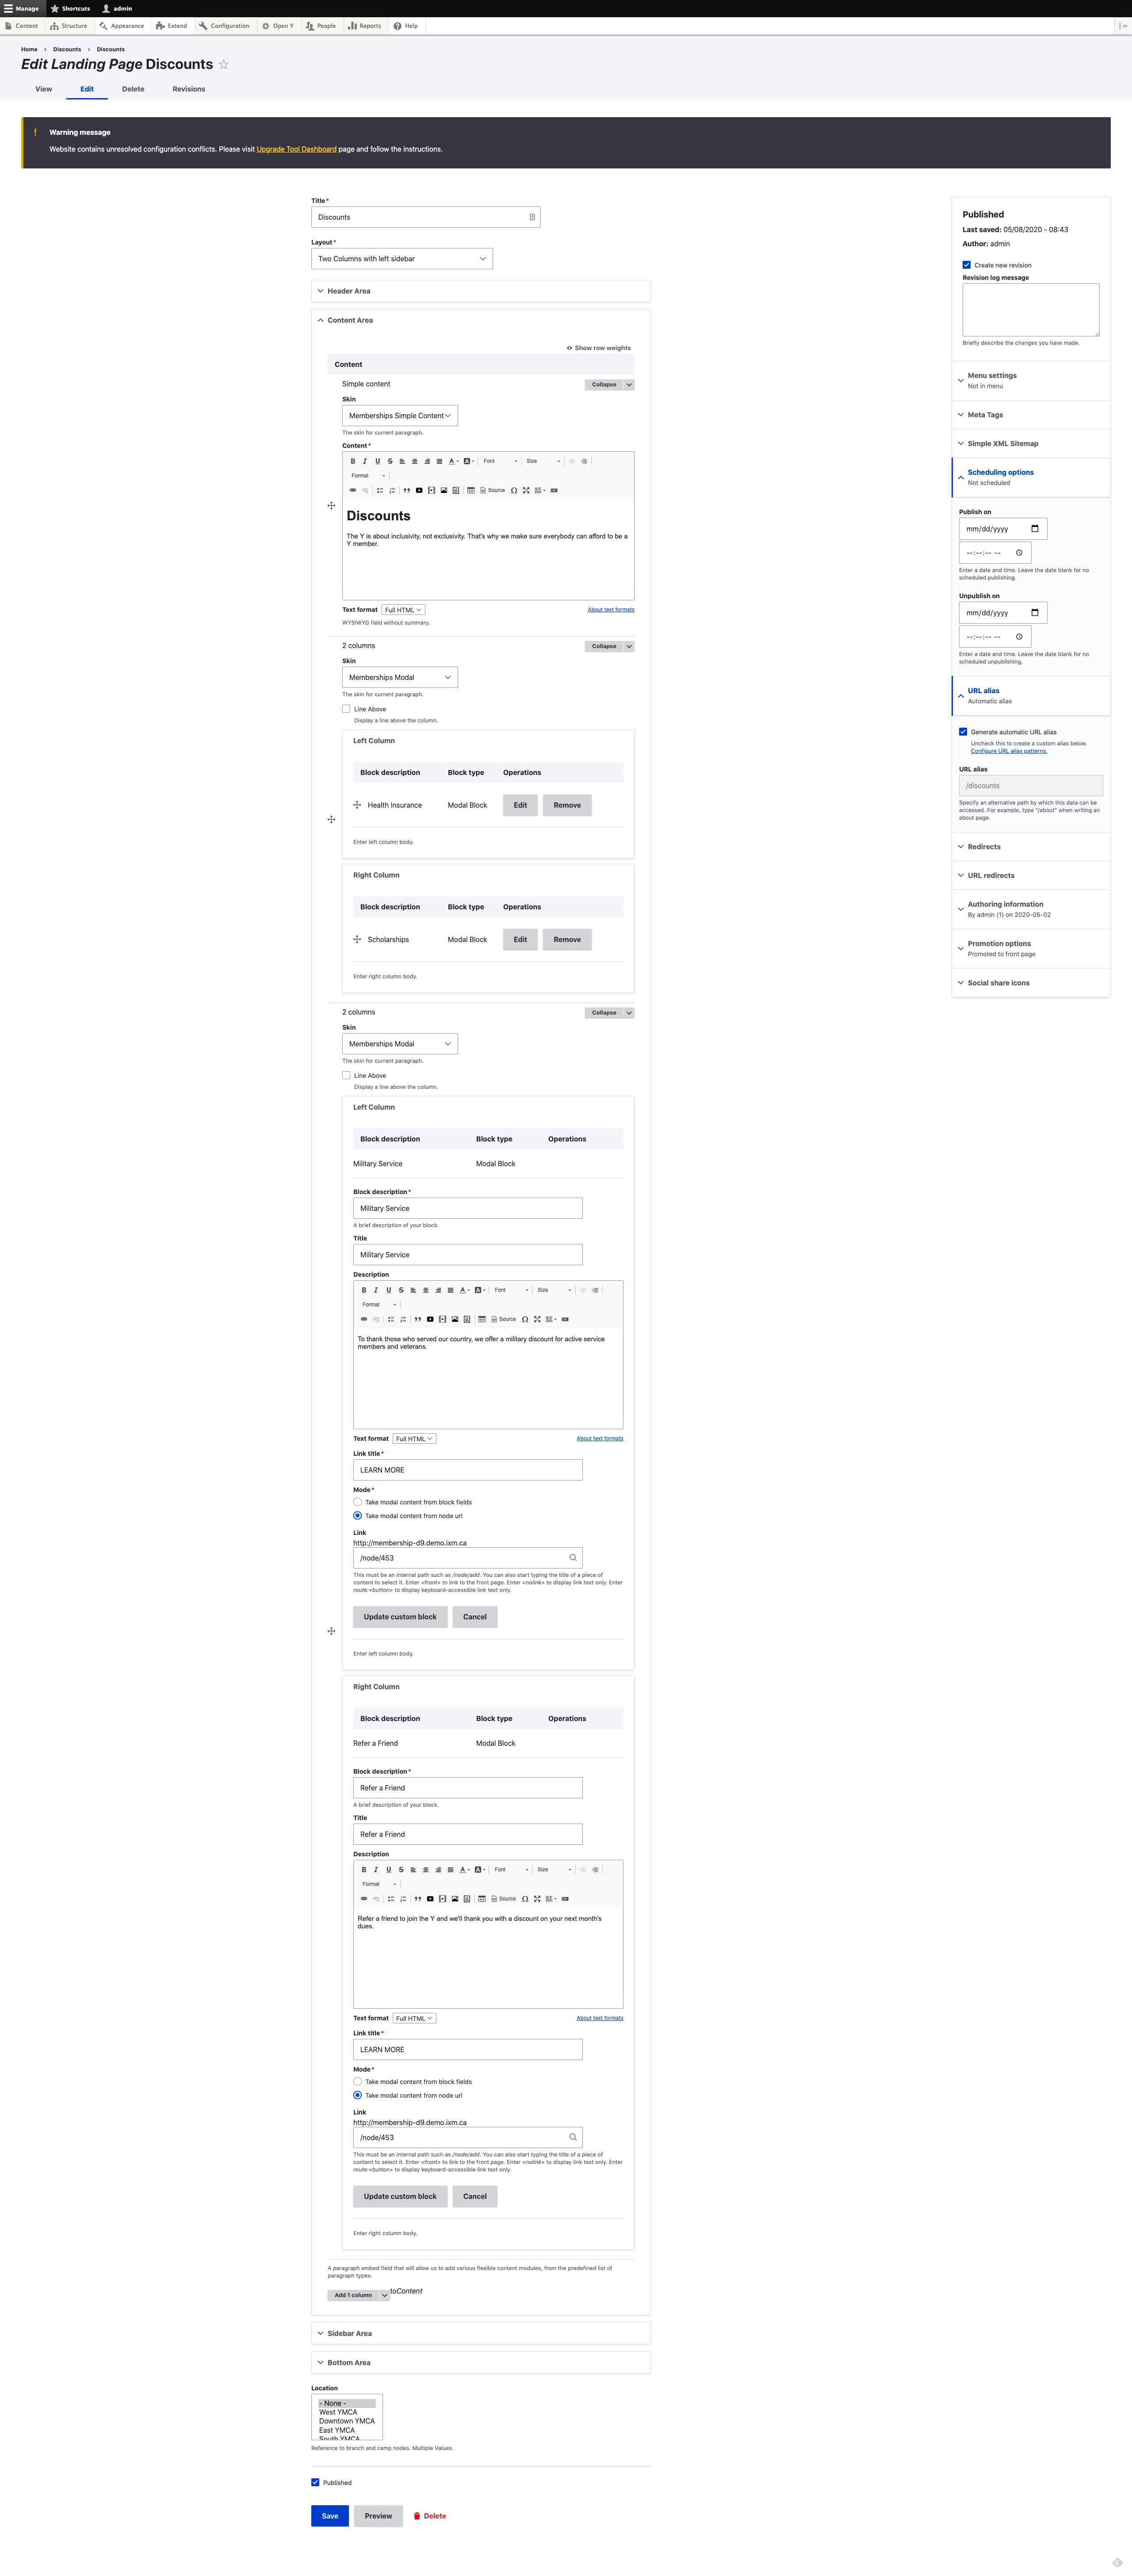
Discounts
- Go to
/node/add/landing_page - Title: Corporate wellness
- Layout: Two Columns with left sidebar
- Header Area: add “Small banner” paragraph and fill the fields
- Content Area: fill the area with content. An example is shown in the next screenshot
- Sidebar Area: follow the same steps for “Membership Builder” page
- Save the landing page
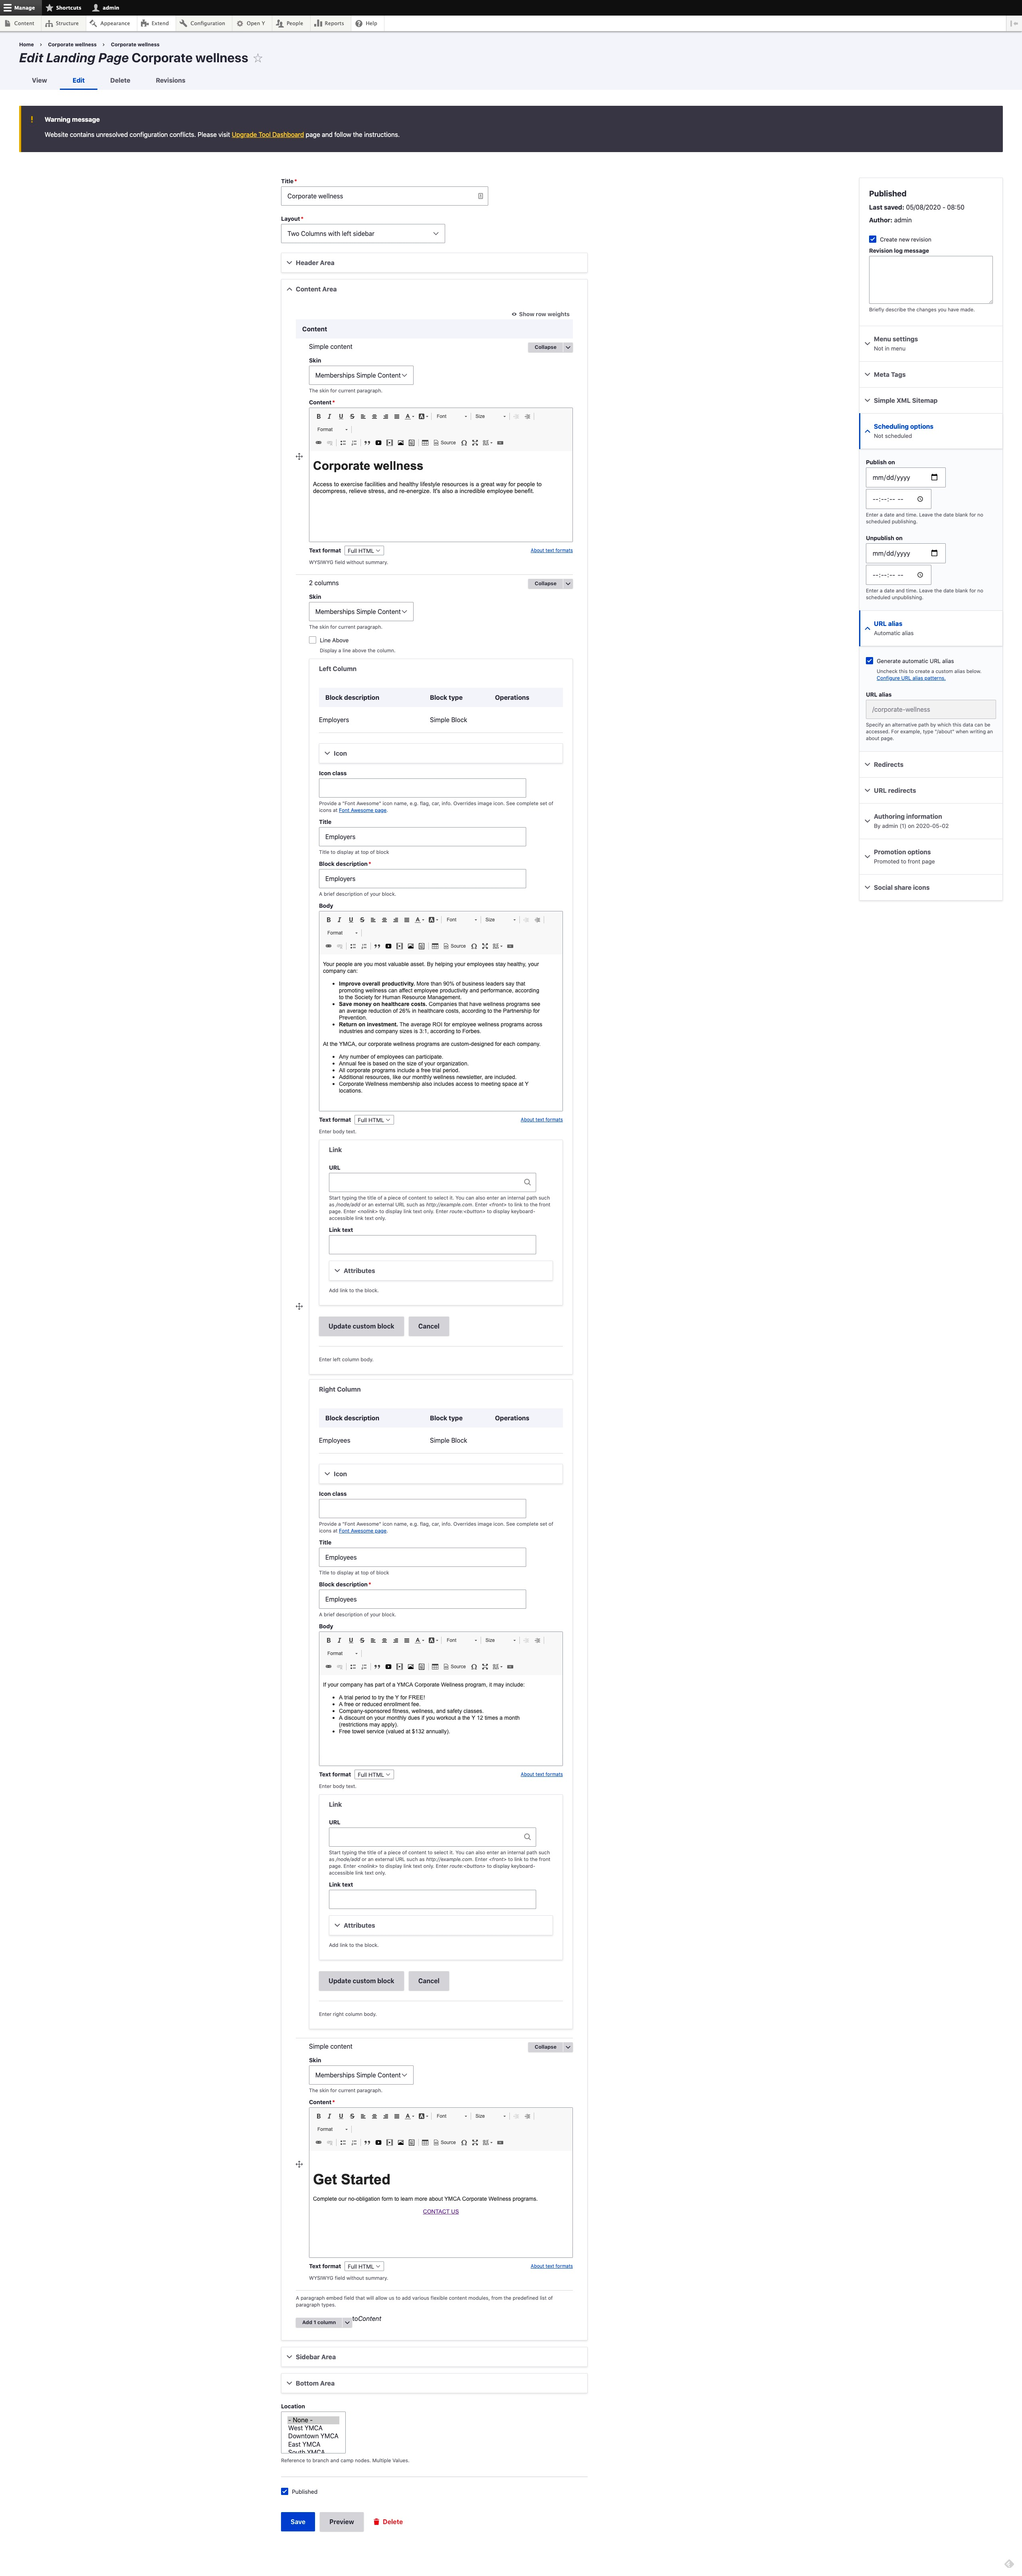
Corporate Wellness
- Go to
/node/add/landing_page - Title: Corporate wellness
- Layout: Two Columns with left sidebar
- Header Area: add “Small banner” paragraph and fill the fields
- Content Area: fill the area with content. An example is shown in the next screenshot
- Sidebar Area: follow the same steps for “Membership Builder” page
- Save the landing page
Free Trial
- Go to
/node/add/landing_page - Title: Free Trial
- Layout: Two Columns with left sidebar
- Header Area: add “Small banner” paragraph and fill the fields
- Content Area: add “Simple content” with a description
- Content Area: add ”Webform” with “Memberships Free Trial Webform” skin and “Memberships Free Trial” webform
- Sidebar Area: follow the same steps for “Membership Builder” page
2. Membership Products:
- Go to
/admin/commerce/products - Click on + Add product, then choose Membership
- You’ll see these fields:
- Title
- Description
- Add-ons (used in specific cases, skip for default setup)
- Total Available
- Subfields:
- Related Add-on (skip for default functionality)
- Age groups (select age groups, usually Adults, Youth, Seniors)
- Total Available (number of people allowed for age group selected above for the membership product. You can add multiple groups by clicking “Add another item” for Family memberships)
- Total Free (designed for cases where extra people are allowed in the membership, but with an additional fee. Fill with the same value as Total Available for default functionality)
- Branches in the product (use if a membership is specific to a branch. If “None” is selected, the membership will appear for all branches)
- A typical setup is shown in the following screenshot
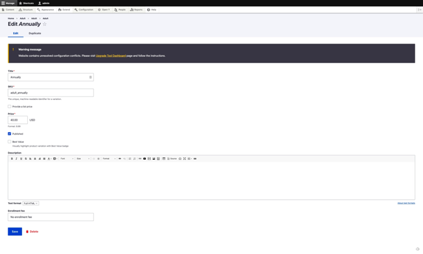
- Click on the “Save and add variations” button (or go to the “Variations” tab if editing a previously created product)
- A typical setup for variations of a membership is shown in the following screenshot