Membership Framework
This application is built on Drupal Commerce and provides advanced options for building a membership journey.
The Membership Framework is distributed in the
openy_memberships repository and must be
added and installed on top of the base distribution. We recommend working with your development partner if you wish to go this route.
Check out the Membership Framework sandboxes for a demonstration.
Membership Landing Pages
To get started with the Membership Framework you will first need to create a number of landing pages.
The examples below use Paragraphs, but similar pages can be created using Layout Builder blocks and the Membership Framework custom block.
Membership Builder
- Go to
/node/add/landing_page - Title: Membership Builder
- Layout: Two Columns with left sidebar
- Header Area: add “Small banner” paragraph and fill the fields
- Content area: add “Memberships” paragraph (it has pre-filled fields)
- Sidebar Area: add “Block Container” paragraph with “Memberships Desktop Sidebar” skin
- Block_ref: choose “Paragraph container” with “Memberships Menu Container” title
- Sidebar Area: add “Simple content” with “Memberships Button” skin and link to builder in content:
<p><a class="btn btn-primary" href="/membership-builder"><span class="text">JOIN THE Y</span></a></p>
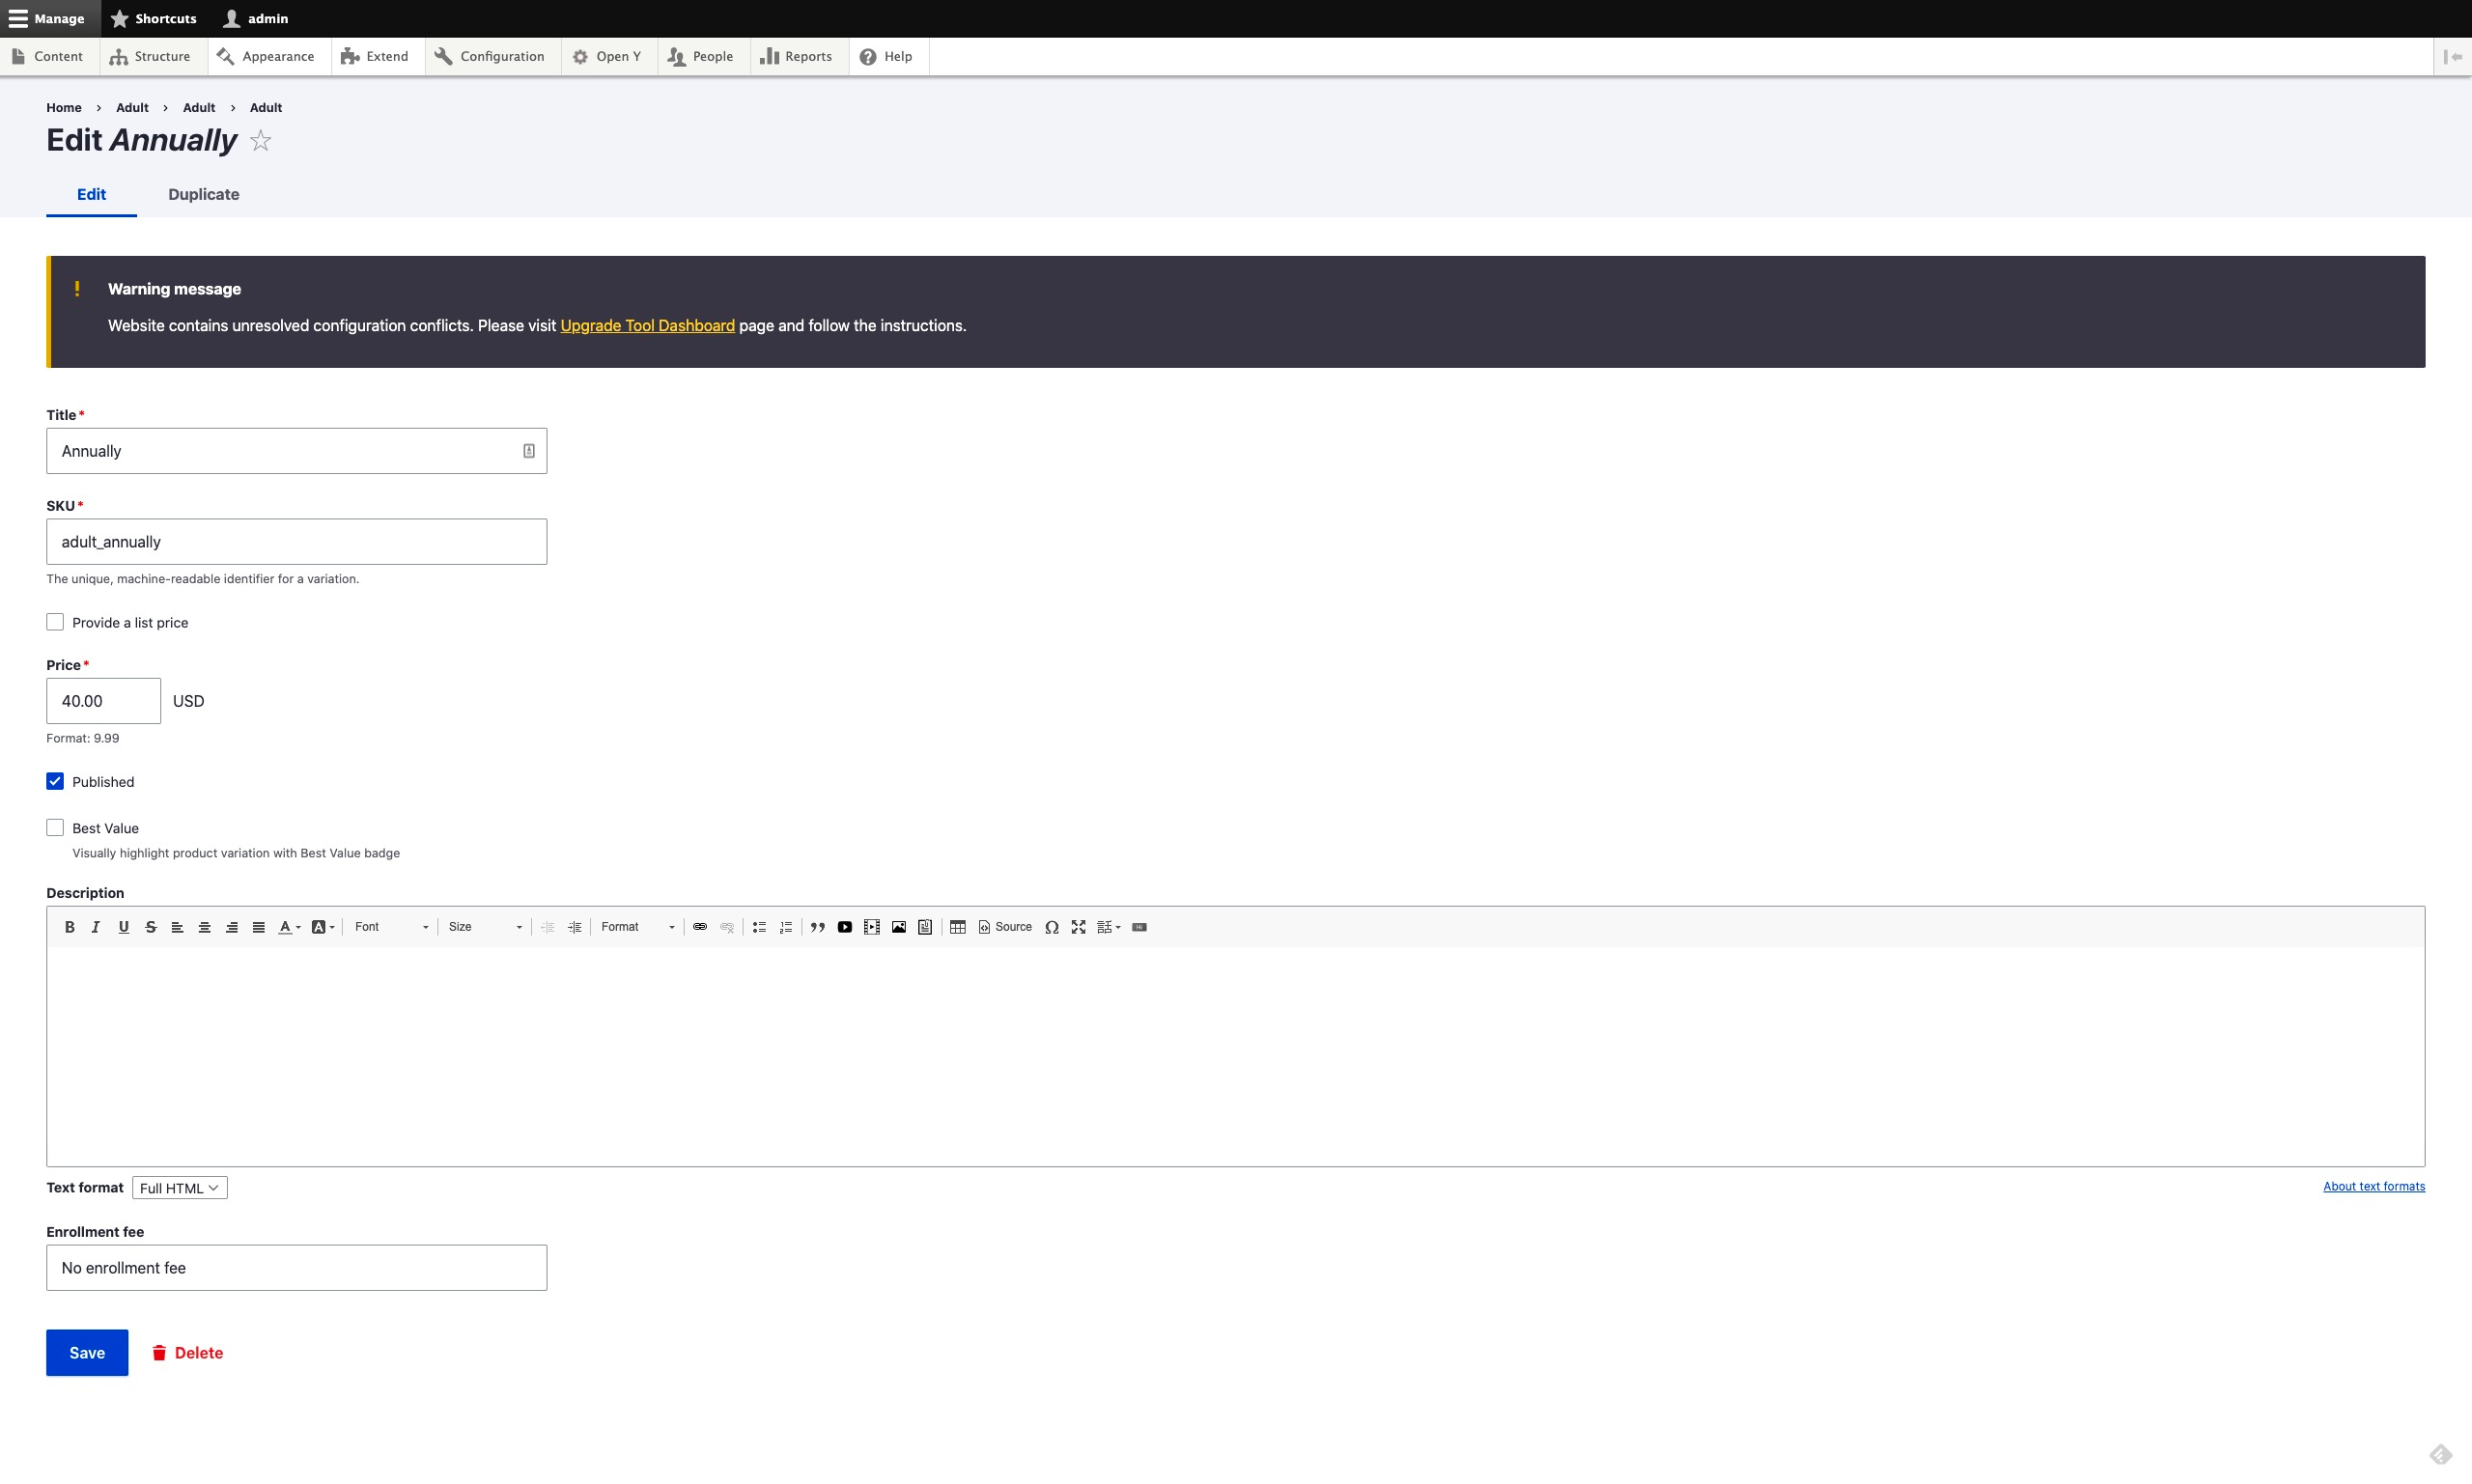
- Sidebar Area: add “Sidebar Menu” with “Memberships Sidebar Menu” skin to create your Memberships Menu with these items:
- Membership Types
- Member Benefits
- Discounts
- Corporate wellness
- Free Trial
- Sidebar Area: add “Block container” with “Memberships Feature card” skin. Use “Feature Card” block type with any content allowed in this block
- Save the landing page
Membership Types
- Go to
/node/add/landing_page - Title: Membership Types
- Layout: Two Columns with left sidebar
- Header Area: add “Small banner” paragraph and fill the fields
- Content Area:
- add “Simple content” paragraph with “Membership Simple Content” skin and text
- add “Membership Types Listing” with “Membership Types” skin
- Sidebar Area: follow the same steps for “Membership Builder” page
- Save the landing page
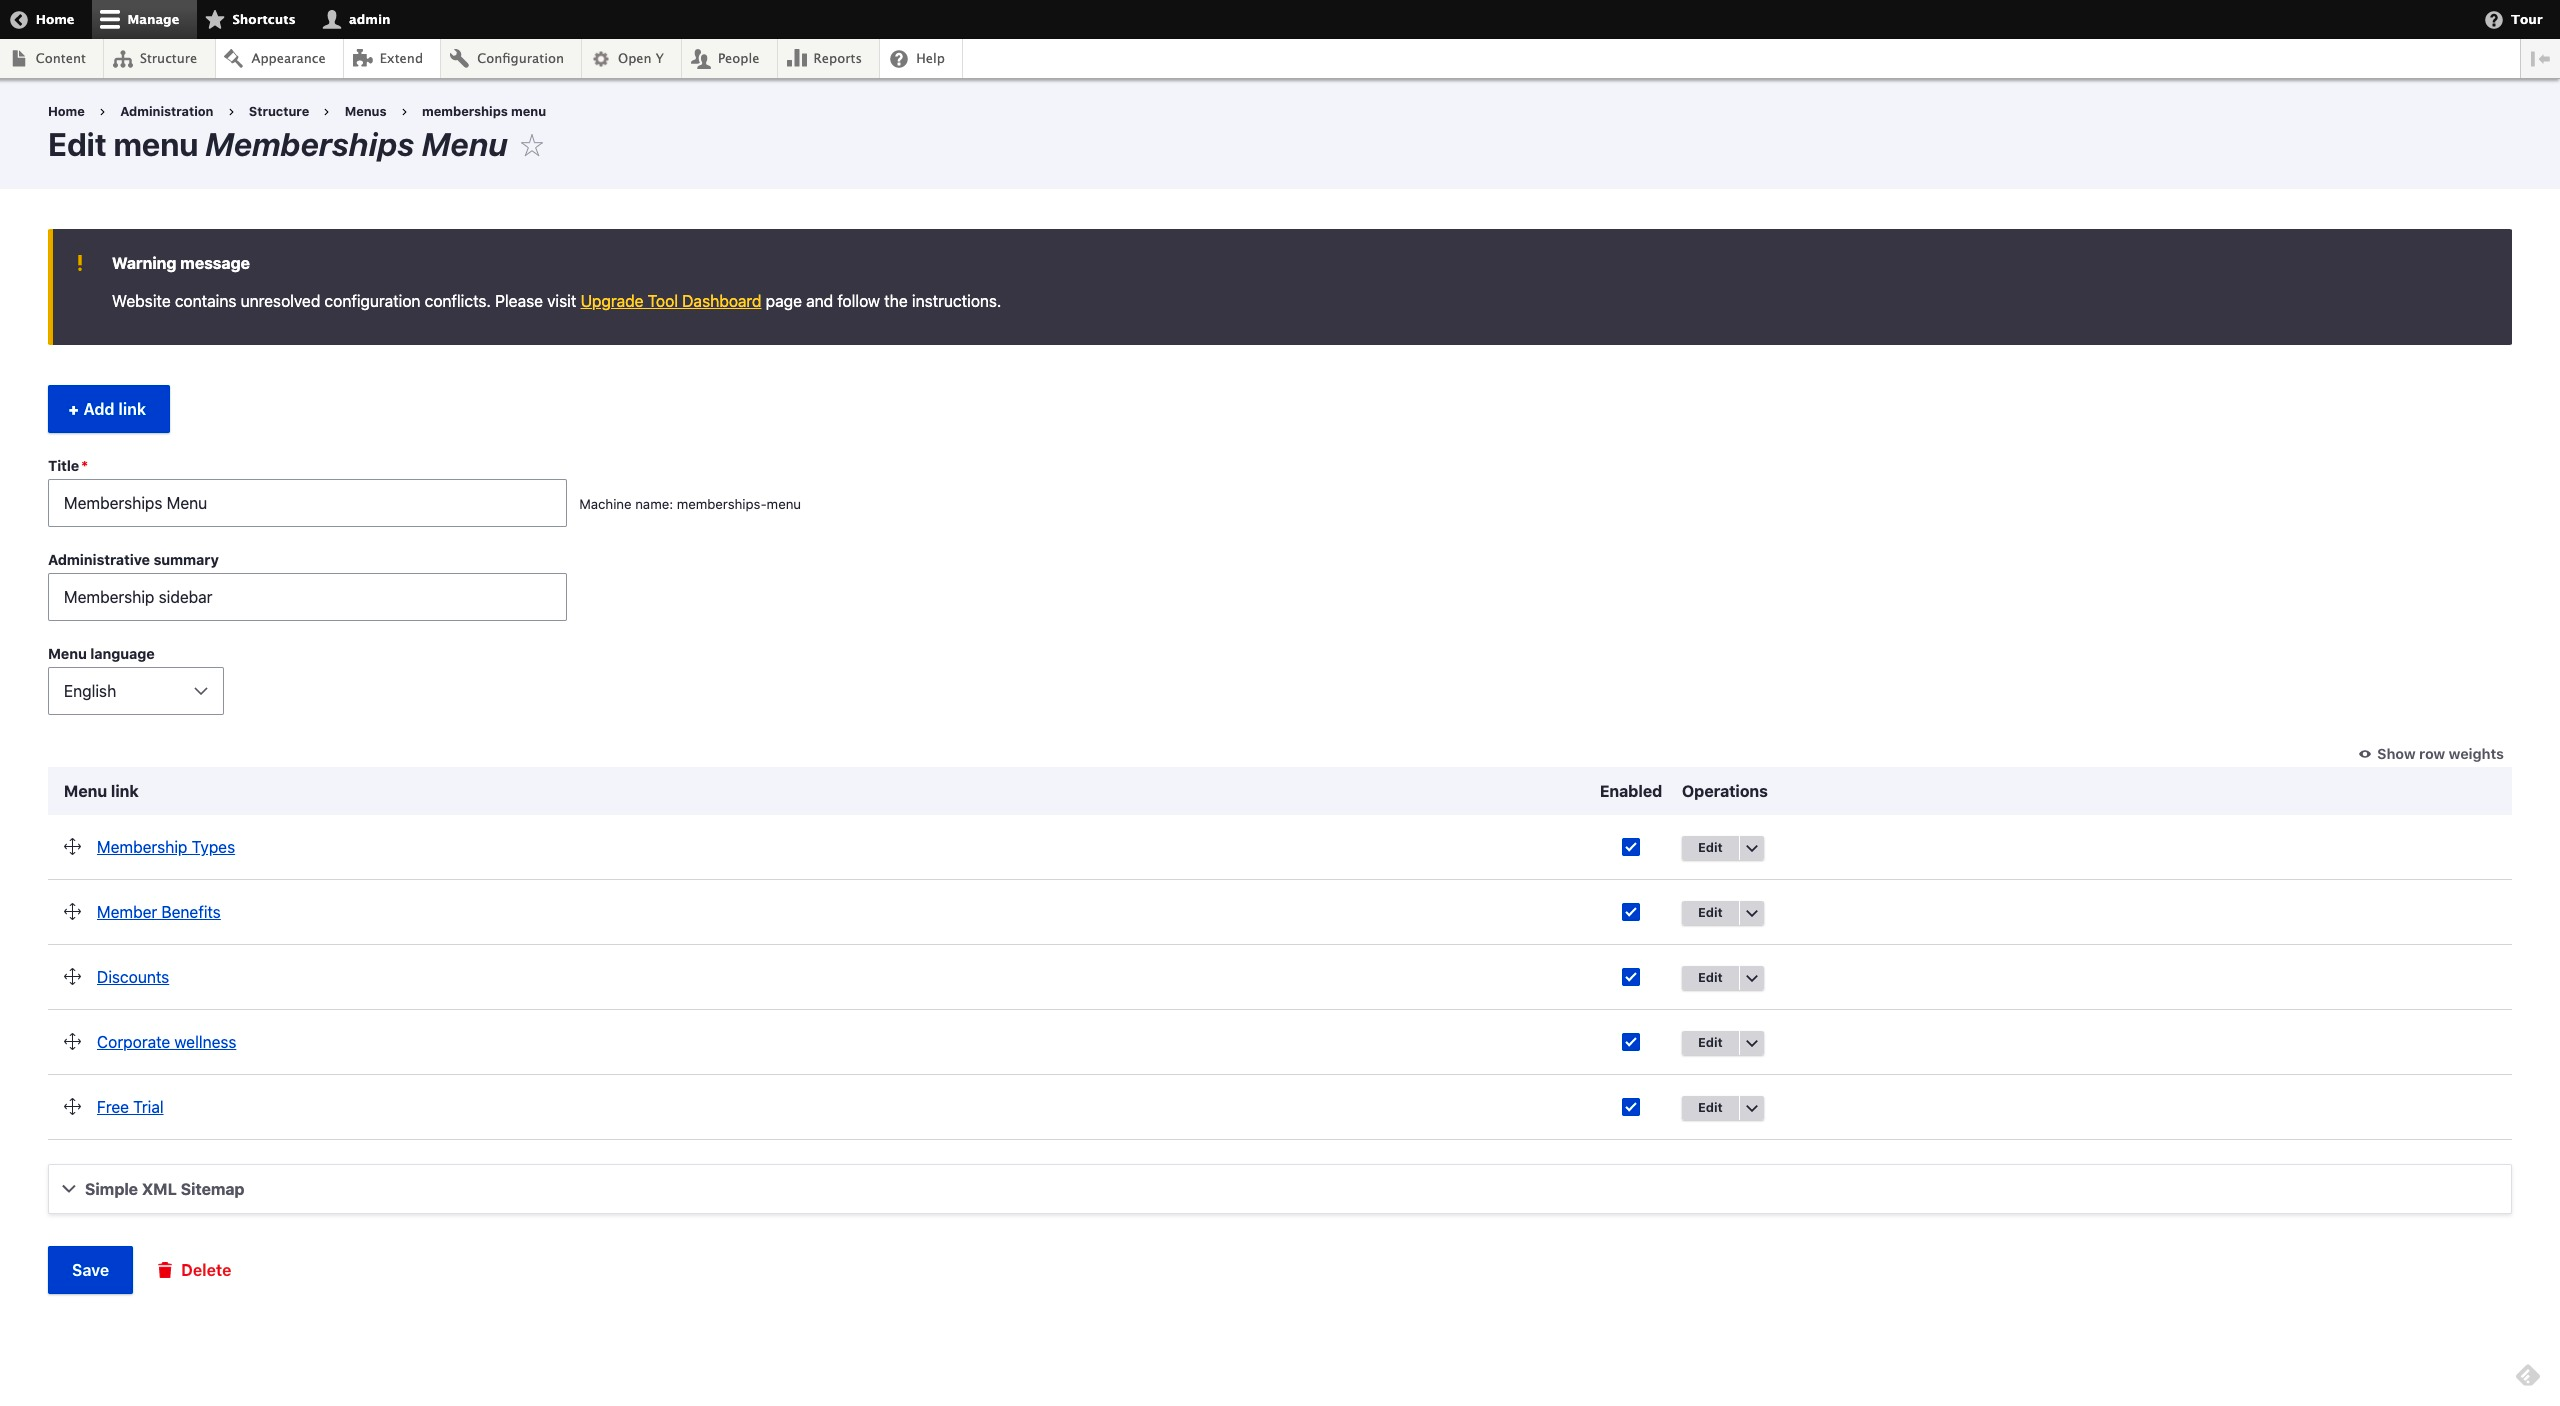
Member Benefits
- Go to
/node/add/landing_page - Title: Membership Types
- Layout: Two Columns with left sidebar
- Header Area: add “Small banner” paragraph and fill the fields
- Content Area: fill the area with content. An example is shown in the next screenshot
- Sidebar Area: follow the same steps for “Membership Builder” page
- Save the landing page
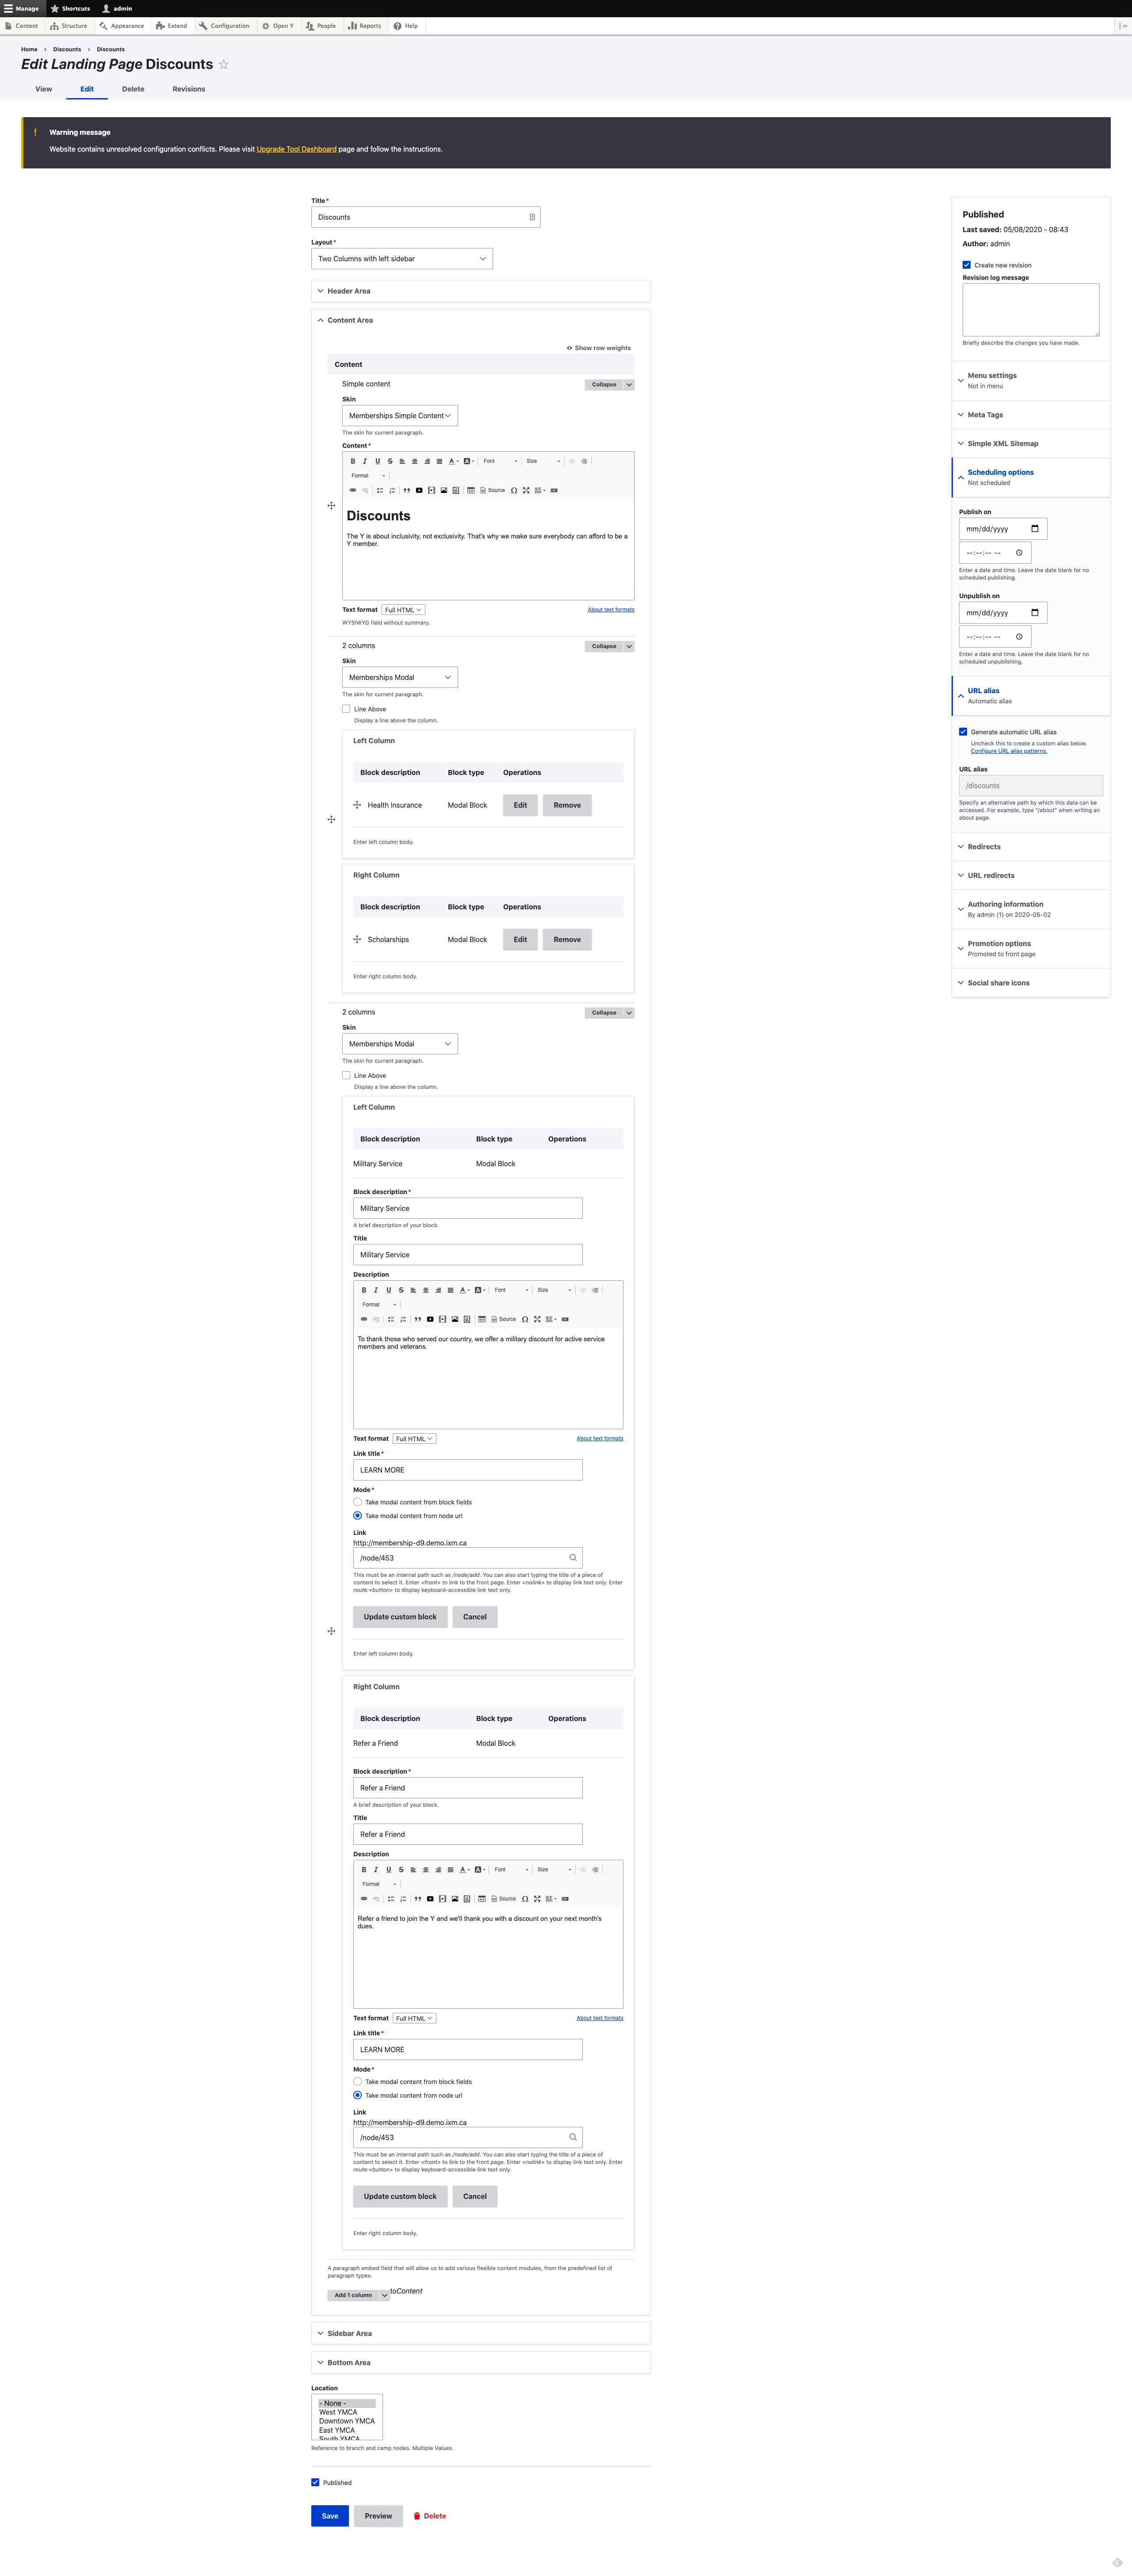
Discounts
- Go to
/node/add/landing_page - Title: Corporate wellness
- Layout: Two Columns with left sidebar
- Header Area: add “Small banner” paragraph and fill the fields
- Content Area: fill the area with content. An example is shown in the next screenshot
- Sidebar Area: follow the same steps for “Membership Builder” page
- Save the landing page
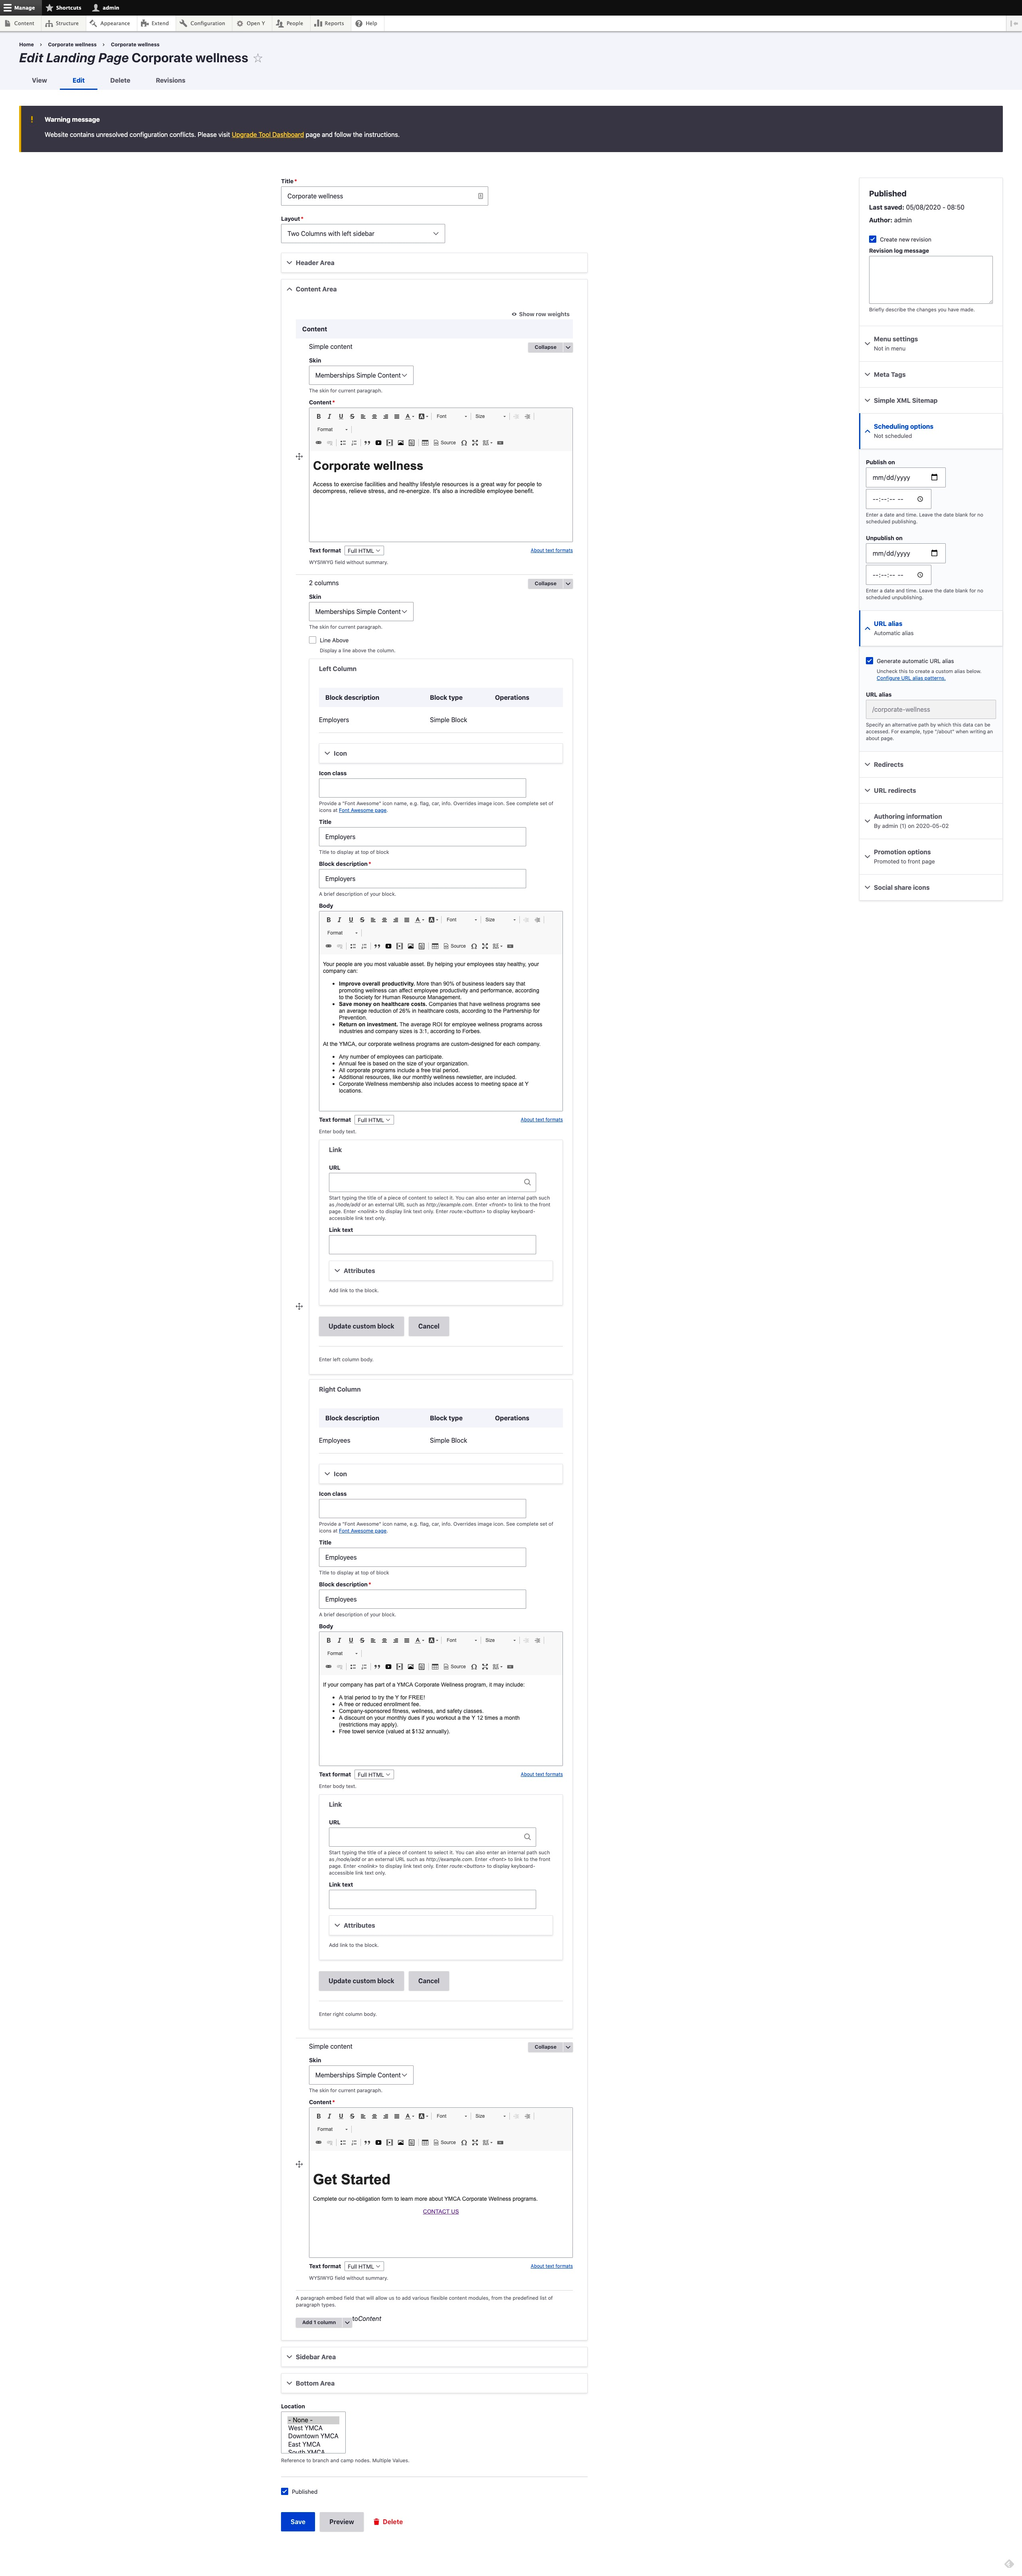
Corporate Wellness
- Go to
/node/add/landing_page - Title: Corporate wellness
- Layout: Two Columns with left sidebar
- Header Area: add “Small banner” paragraph and fill the fields
- Content Area: fill the area with content. An example is shown in the next screenshot
- Sidebar Area: follow the same steps for “Membership Builder” page
- Save the landing page
Free Trial
- Go to
/node/add/landing_page - Title: Free Trial
- Layout: Two Columns with left sidebar
- Header Area: add “Small banner” paragraph and fill the fields
- Content Area: add “Simple content” with a description
- Content Area: add ”Webform” with “Memberships Free Trial Webform” skin and “Memberships Free Trial” webform
- Sidebar Area: follow the same steps for “Membership Builder” page
2. Membership Products:
- Go to
/admin/commerce/products - Click on + Add product, then choose Membership
- You’ll see these fields:
- Title
- Description
- Add-ons (used in specific cases, skip for default setup)
- Total Available
- Subfields:
- Related Add-on (skip for default functionality)
- Age groups (select age groups, usually Adults, Youth, Seniors)
- Total Available (number of people allowed for age group selected above for the membership product. You can add multiple groups by clicking “Add another item” for Family memberships)
- Total Free (designed for cases where extra people are allowed in the membership, but with an additional fee. Fill with the same value as Total Available for default functionality)
- Branches in the product (use if a membership is specific to a branch. If “None” is selected, the membership will appear for all branches)
- A typical setup is shown in the following screenshot
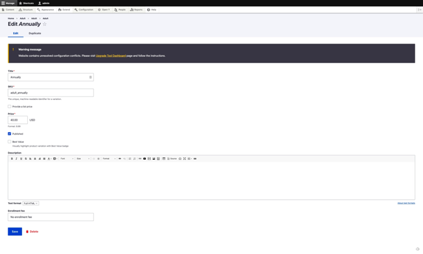
- Click on the “Save and add variations” button (or go to the “Variations” tab if editing a previously created product)
- A typical setup for variations of a membership is shown in the following screenshot