See PEF Schedules for installation instructions.
Once you install the PEF Schedules module, you will be able to build schedules and add sessions via a calendar-based builder.
Before you start
Create schedule groupings
The Schedule editor allows Content Editors to create Sessions on a “WYSIWYG” calendar interface. As described in the PEF data model, Sessions require Classes, which require Activities, which require Program Subcategories, which require Programs.
flowchart LR
    subgraph "PEF Relationships"
        direction LR
        Session -- requires --> Class
        Class -- references --> Activity
        Activity -- references --> PS
        PS -- requires --> Program
        PS["Program Subcategory"]
    end
You will need to create at least a Class and Activity to start adding events to the calendar. Go to Admin > Content > Add Content (/node/add) to start adding items.
If you have preexisting content for any of these content types you can use them here. You may first need to configure the Activity Color for existing Activities.
Activity colors
PEF Schedules adds a new Color field to Activities which is used to style the categories on the calendar.
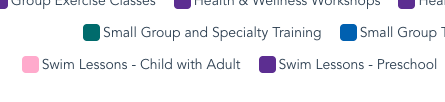
The Color field takes a hex value (#XXXXXX where X is a hexadecimal character (0-9, a-f)). We recommend using colors from the
Brand Standard Color Wheel. The default color is configurable in the Calendar Settings. We recommend selecting dark tones from the color wheel. as the item titles are displayed with white text.
Calendar settings
Settings for the calendar are configurable at Admin > YMCA Website Services > Settings > Schedules calendar settings (admin/openy/settings/schedules-calendar).
Options include:
- Slot settings - These relate to creating events on the calendar.
- Slot Duration - The default length of each time slot.
- Snap Duration - The default granularity to which events “snap” when clicking and dragging on the calendar.
- Slot Label Interval - The interval between time labels on the calendar’s time axis.
- Time Settings - These help make the calendar display more relevant to your user’s needs.
- Min Time - The earliest time that is visible on the calendar view.
- Max Time - The latest time that is visible on the calendar view.
Manage schedules
Once everything is configured, you can start managing schedules. See a list of available schedules at Admin >
Content > Schedules Calendar (admin/openy/branch-schedules). Click on one of the options to open the editable schedule.
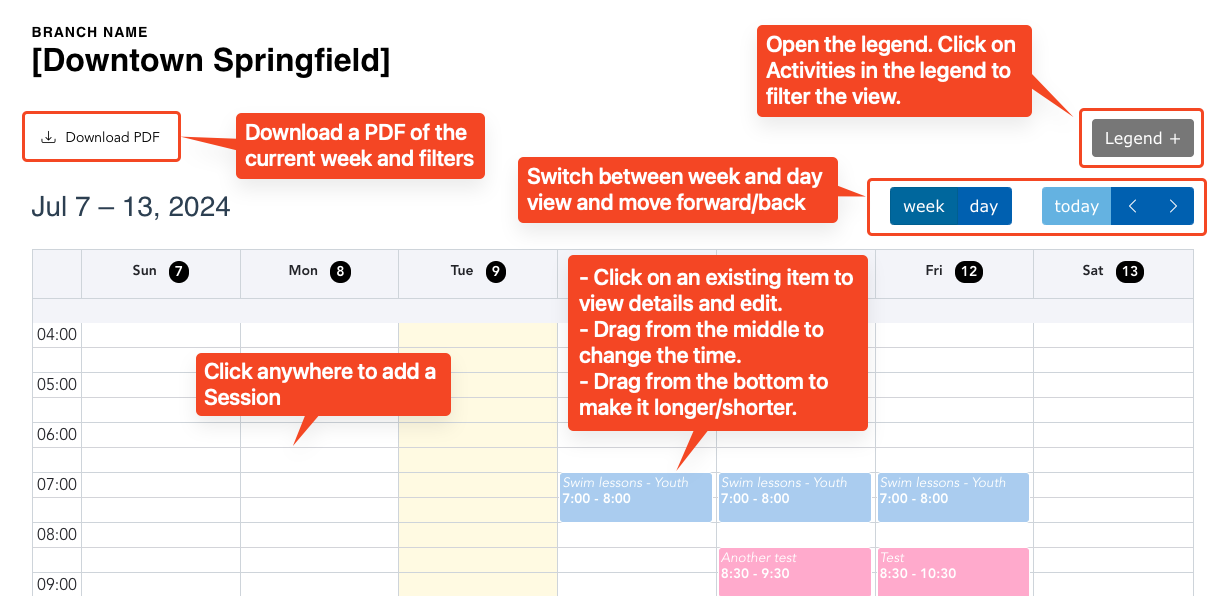
When in the schedule, you can:
- Click Download PDF to download a PDF of the current display.
- Click Legend to open the legend, then click items in the legend to filter the view.
- Use the Week/Day buttons to filter and change the view or page between weeks/days.
- Click anywhere in the calendar to add a session.
- Click on an existing item to view its details and edit.
- Drag from the middle of an item to change its time.
- Drag from the bottom of an item to change its duration.
Create sessions
When creating a session from the schedule, you’ll see a simplified version of the Add Session (/node/add/session) form.
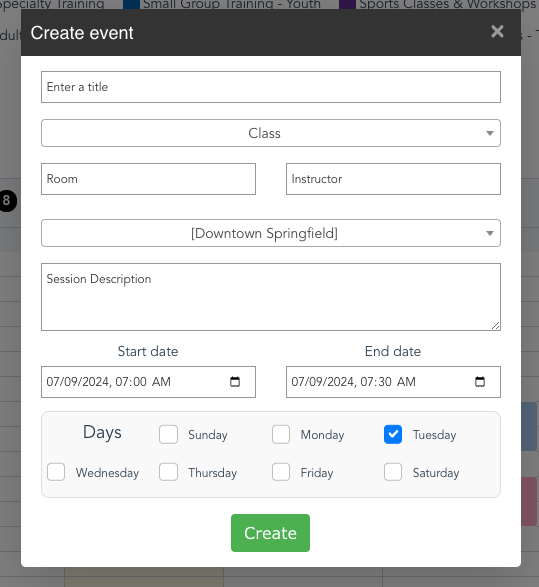
- Enter a Title (required).
- Select a Class from the dropdown (required).
- Enter a Room and/or Instructor (optional).
- Choose a Location (required).
- Add a Session Description (optional).
- Set a Start date/time and End date/time (required). The time values will determine when on each day the session happens. The dates will determine the start and end of its recurrence if it happens across multiple days.
- Set the Days on which the Session recurs during the duration of the dates set above (required).
Display schedules
Once content is added to the schedule, you have several options for showing it to users:
- Place the Simple Schedule block on any Layout Builder page.
- All items added via the Simple Schedule will be shown in Activity Finder or Group Schedules. Follow the directions on those pages to configure the respective components and add them to a page.
- Download the schedule PDF and upload it somewhere on your site.