Overview
The Trash module provides a safety net for content management by implementing soft delete functionality. Instead of permanently deleting content, it moves deleted items to a trash bin where they can be reviewed, restored, or permanently removed later.
What is the Trash Module?
As of the 11.3.1.0 release, the Trash module is enabled by default on new YMCA Website Services installations.
The Trash module adds a trash bin for content entities in your YMCA Website Services site. When editors delete content, it isn’t immediately removed from the database. Instead, it’s moved to a trash storage area where it remains until either:
- An administrator permanently deletes (purges) it
- The automatic cleanup process removes it after the retention period expires
This feature helps prevent accidental data loss and provides an opportunity to recover content that was deleted by mistake.
Key Features
- Soft Delete: Content is hidden rather than permanently removed
- Restore Capability: Deleted content can be fully restored with all data intact
- Trash View: Dedicated interface to view and manage all trashed content
- Permanent Purge: Option to permanently delete content when needed
- Automatic Cleanup: Configure automatic purging of old trashed items
- Entity Support: Works with nodes (content), media, taxonomy terms, and other entities
- Permissions: Granular control over who can restore and purge content
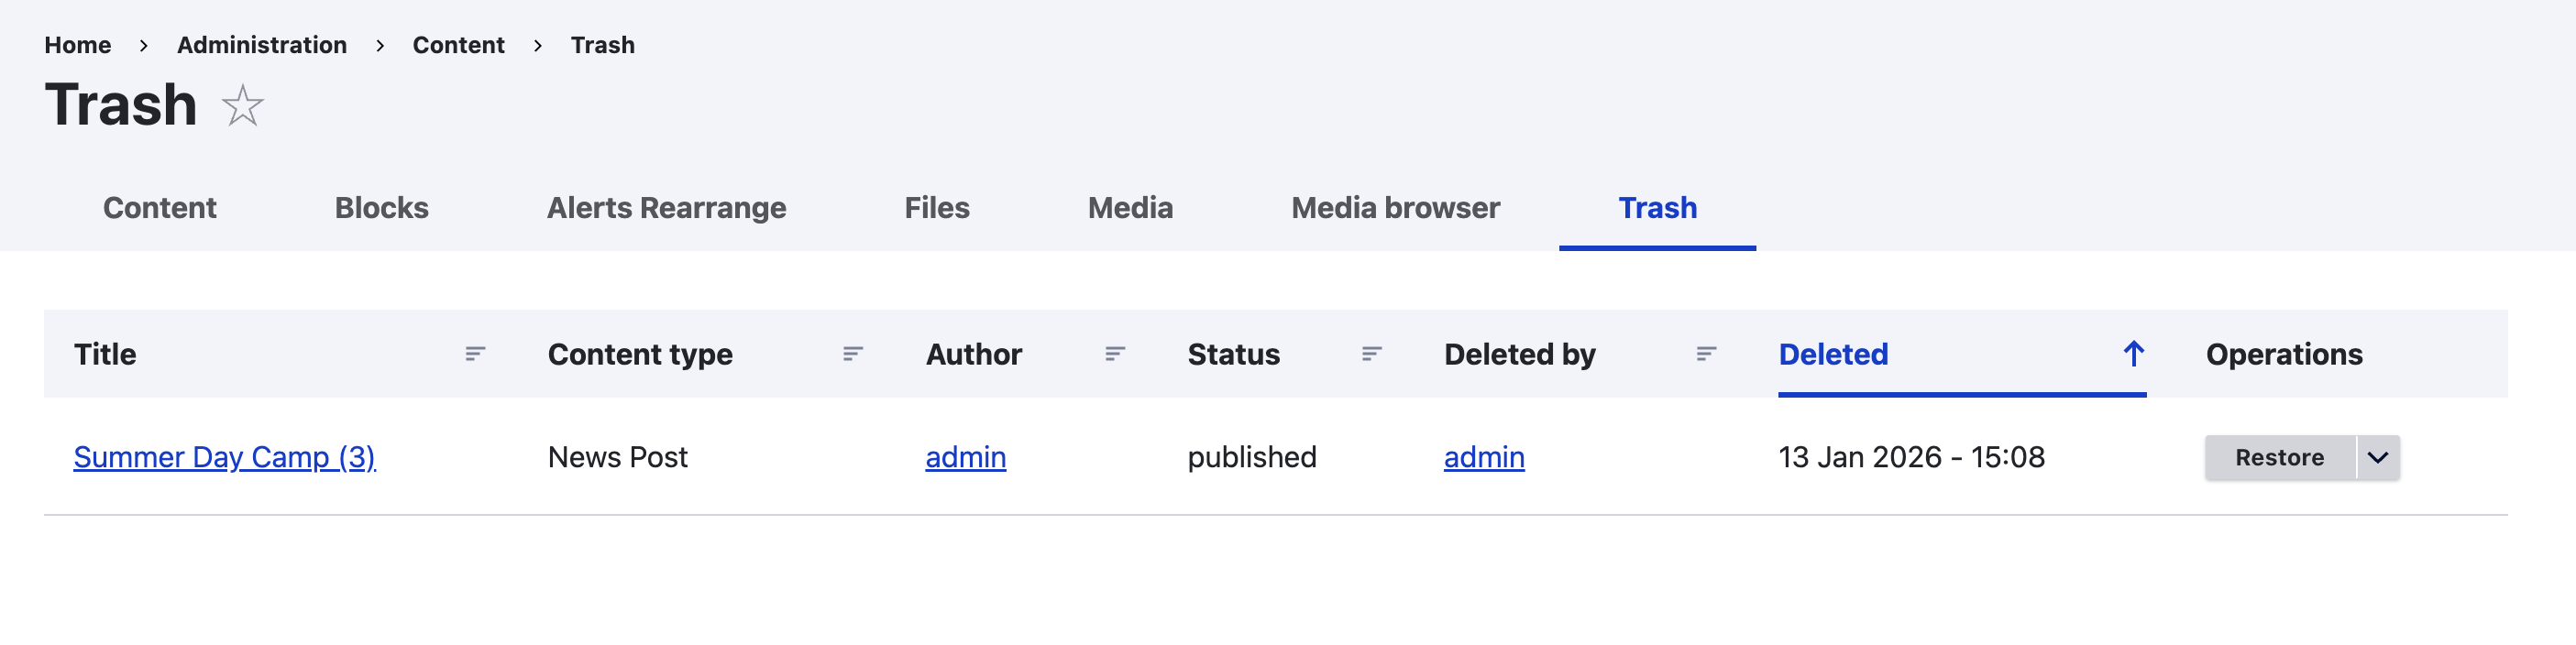
Accessing the Trash
To view deleted content:
- Log in to your site with appropriate permissions
- Navigate to Content > Trash in the admin menu
- Or go directly to
/admin/content/trash
The trash view shows all deleted content with:
- Content title
- Content type
- Deletion date
- Action buttons (Restore, Purge)
Deleting Content
When you delete content using the normal “Delete” button:
- The content is moved to trash (not permanently deleted)
- The content disappears from normal content listings
- The content is hidden from the website
- The content appears in the Trash view
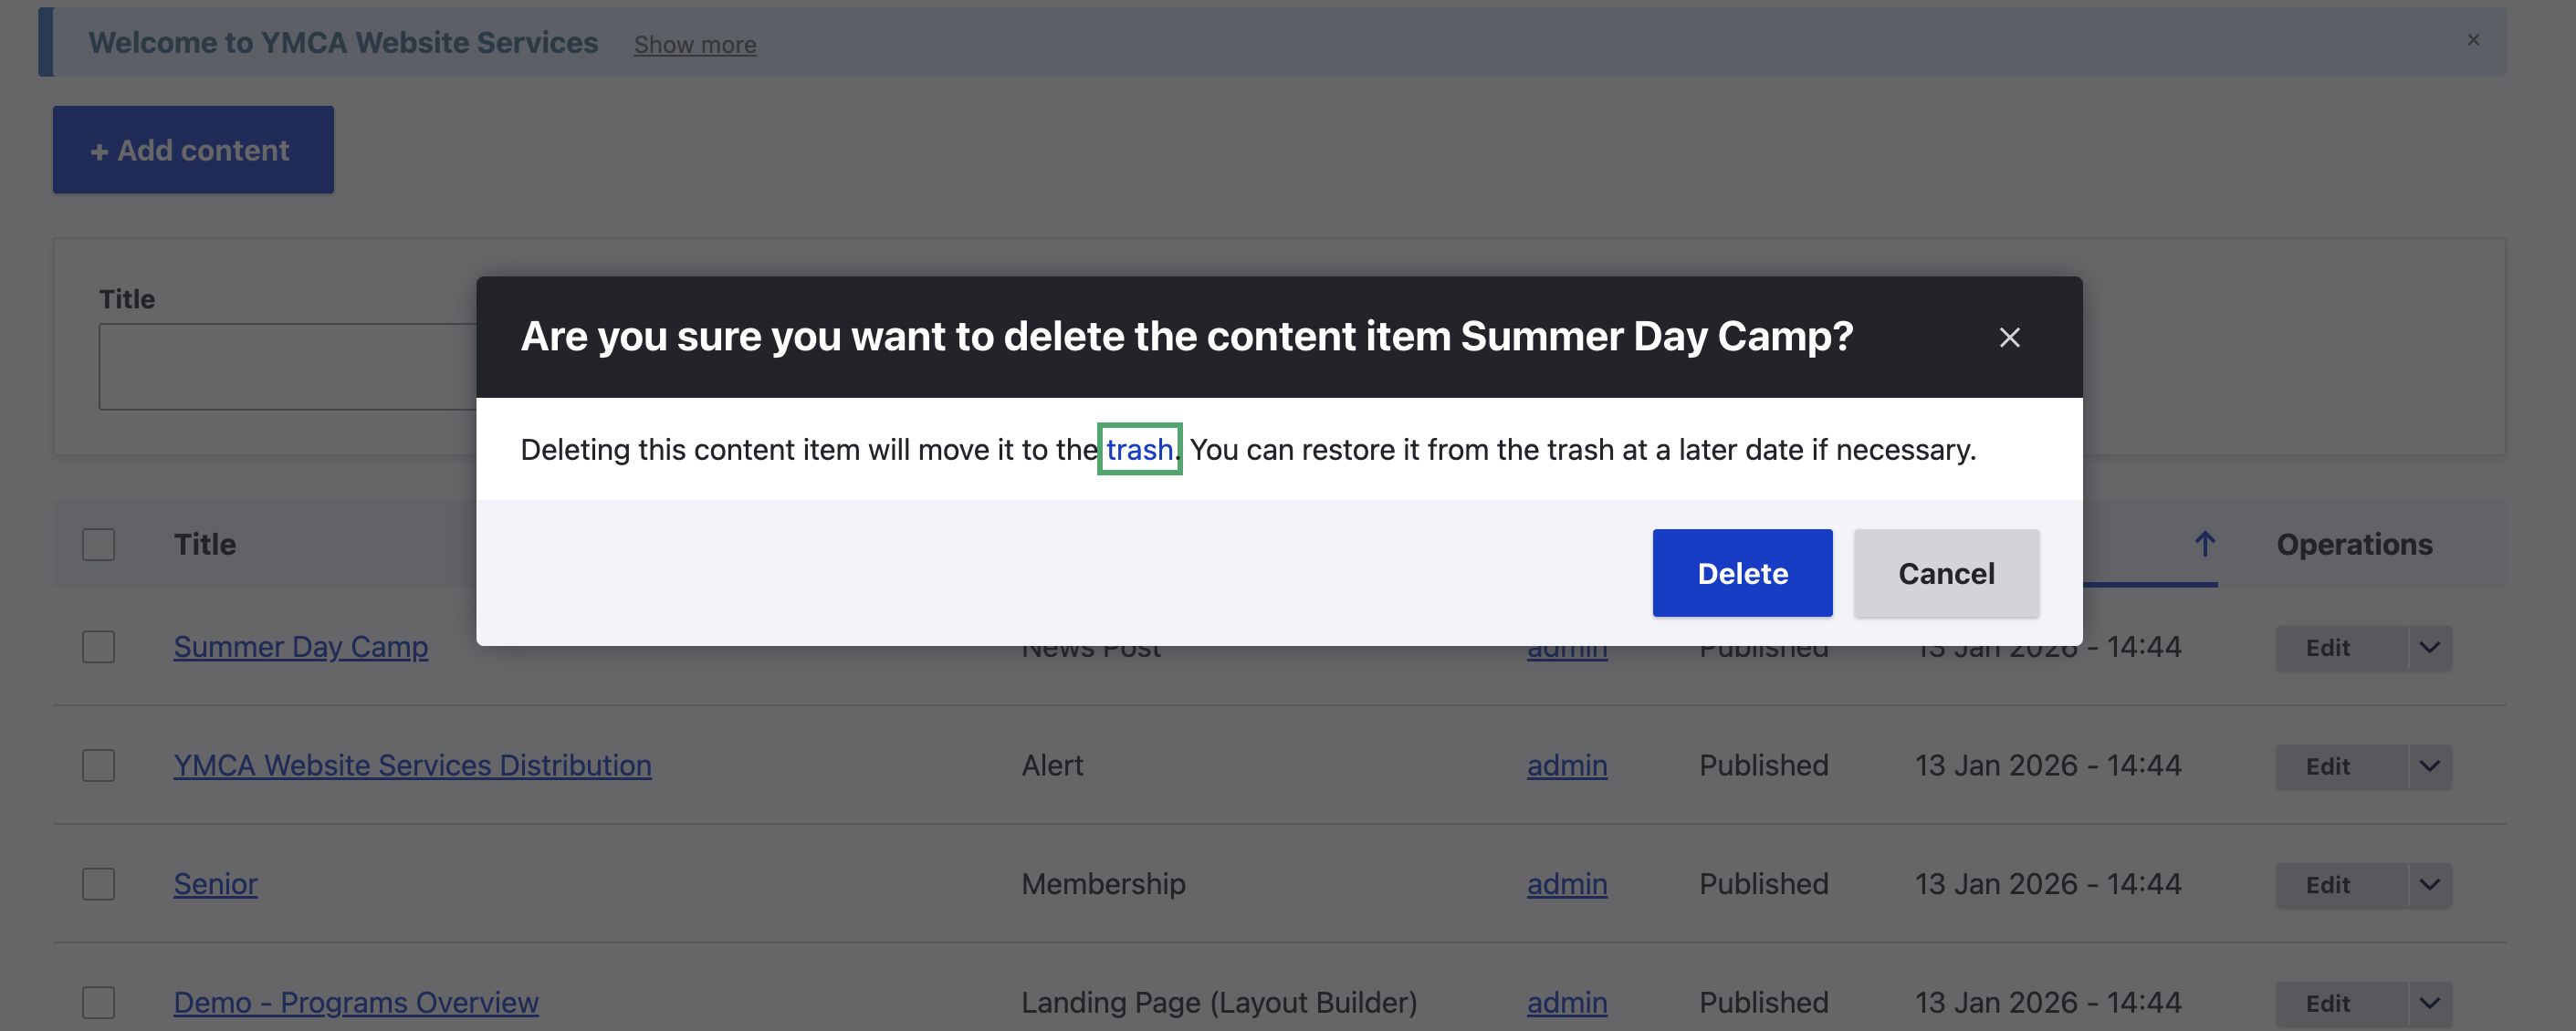
Nothing changes in how you delete content - the Trash module works automatically in the background.
Restoring Content
To restore deleted content:
- Navigate to Content > Trash (
/admin/content/trash) - Locate the content you want to restore
- Click the Restore button in the Operations column
- Confirm the restoration in the popup

Once restored:
- Content returns to the normal content listing
- All field values remain intact
- Content becomes visible on the website again
- Revision history is preserved
Permanently Deleting Content (Purge)
To permanently delete content from the trash:
- Navigate to Content > Trash (
/admin/content/trash) - Locate the content you want to purge
- Click the dropdown arrow next to the “Restore” button
- Select Purge from the dropdown
- Confirm the purge operation
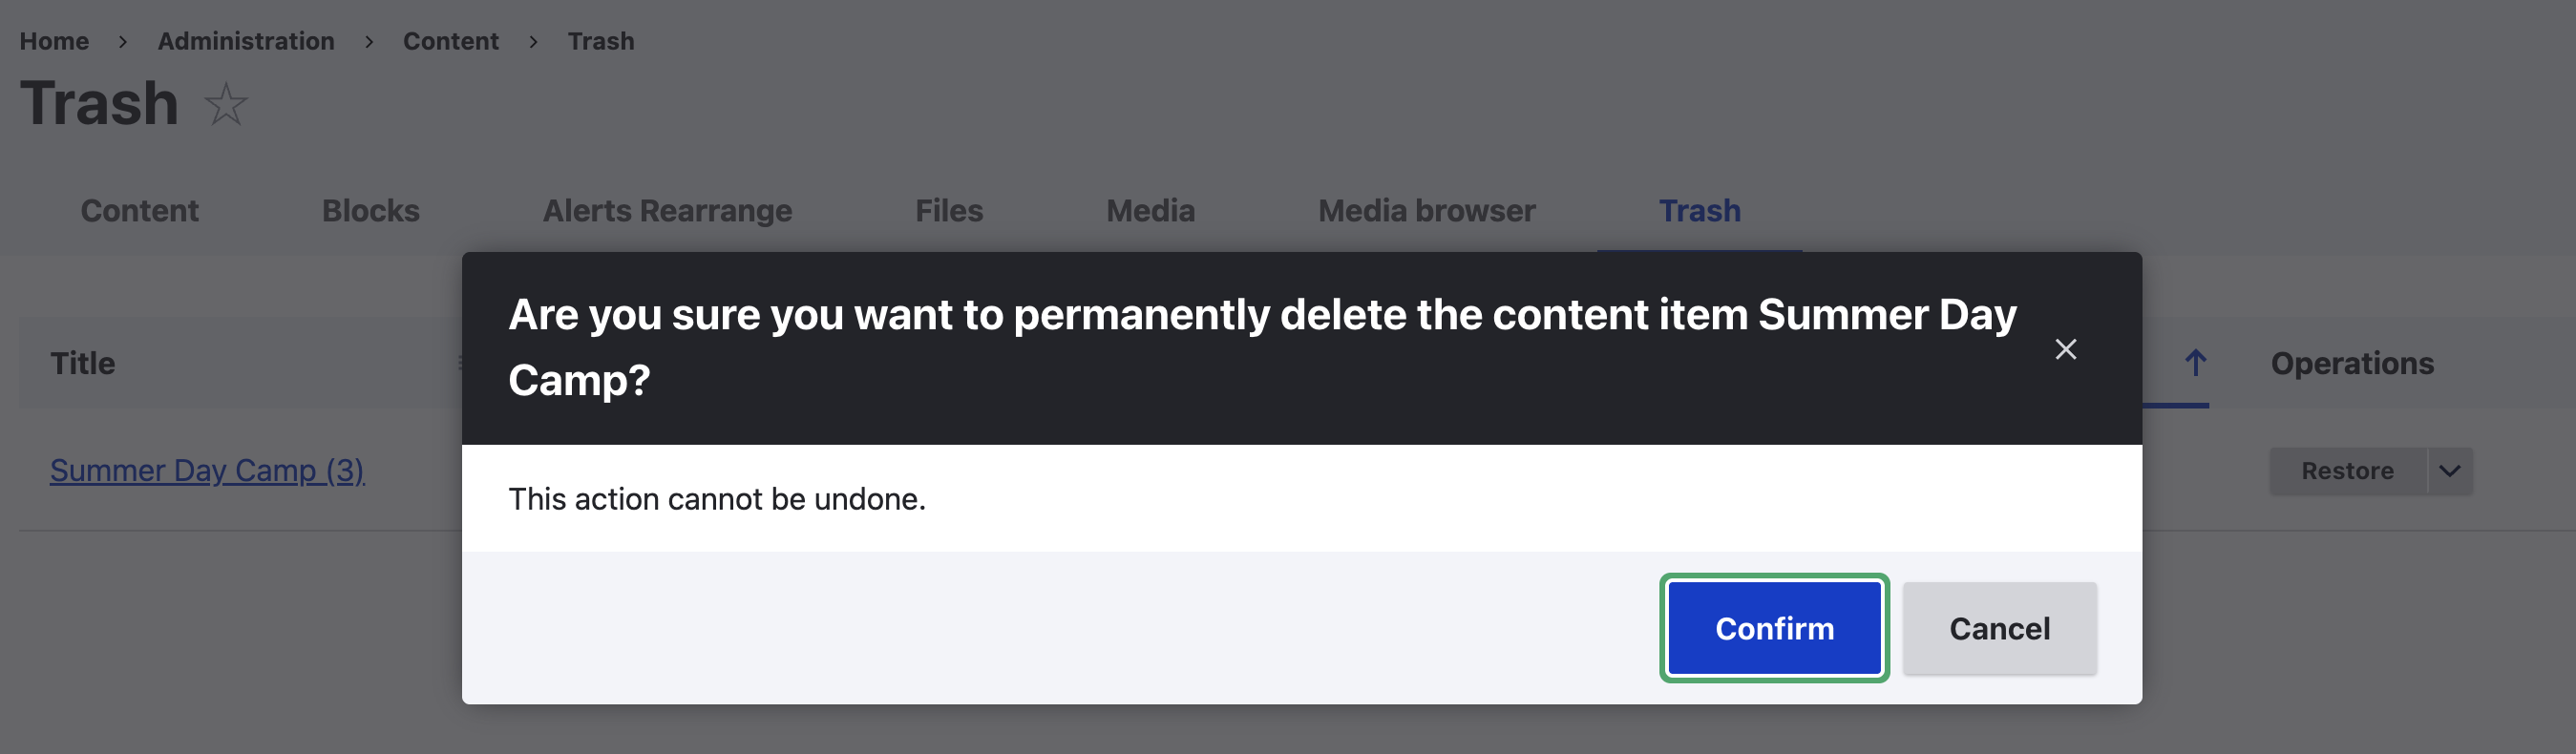
⚠️ Warning: Purging permanently removes content from the database. This action cannot be undone.
Bulk Operations
You can perform actions on multiple items at once:
- Navigate to the Trash view
- Check the boxes next to items you want to process
- Select an action from the bulk operations dropdown:
- Restore selected items
- Purge selected items
- Click “Apply” to execute the action
- Confirm the operation
Permissions
The Trash module provides role-based access control:
Content Contributors
- Can view the trash
- Can restore deleted content
Site Administrators
- Can view the trash
- Can restore deleted content
- Can permanently purge content
To configure permissions:
- Go to People > Permissions (
/admin/people/permissions) - Find “Trash module” permissions
- Assign appropriate permissions to roles
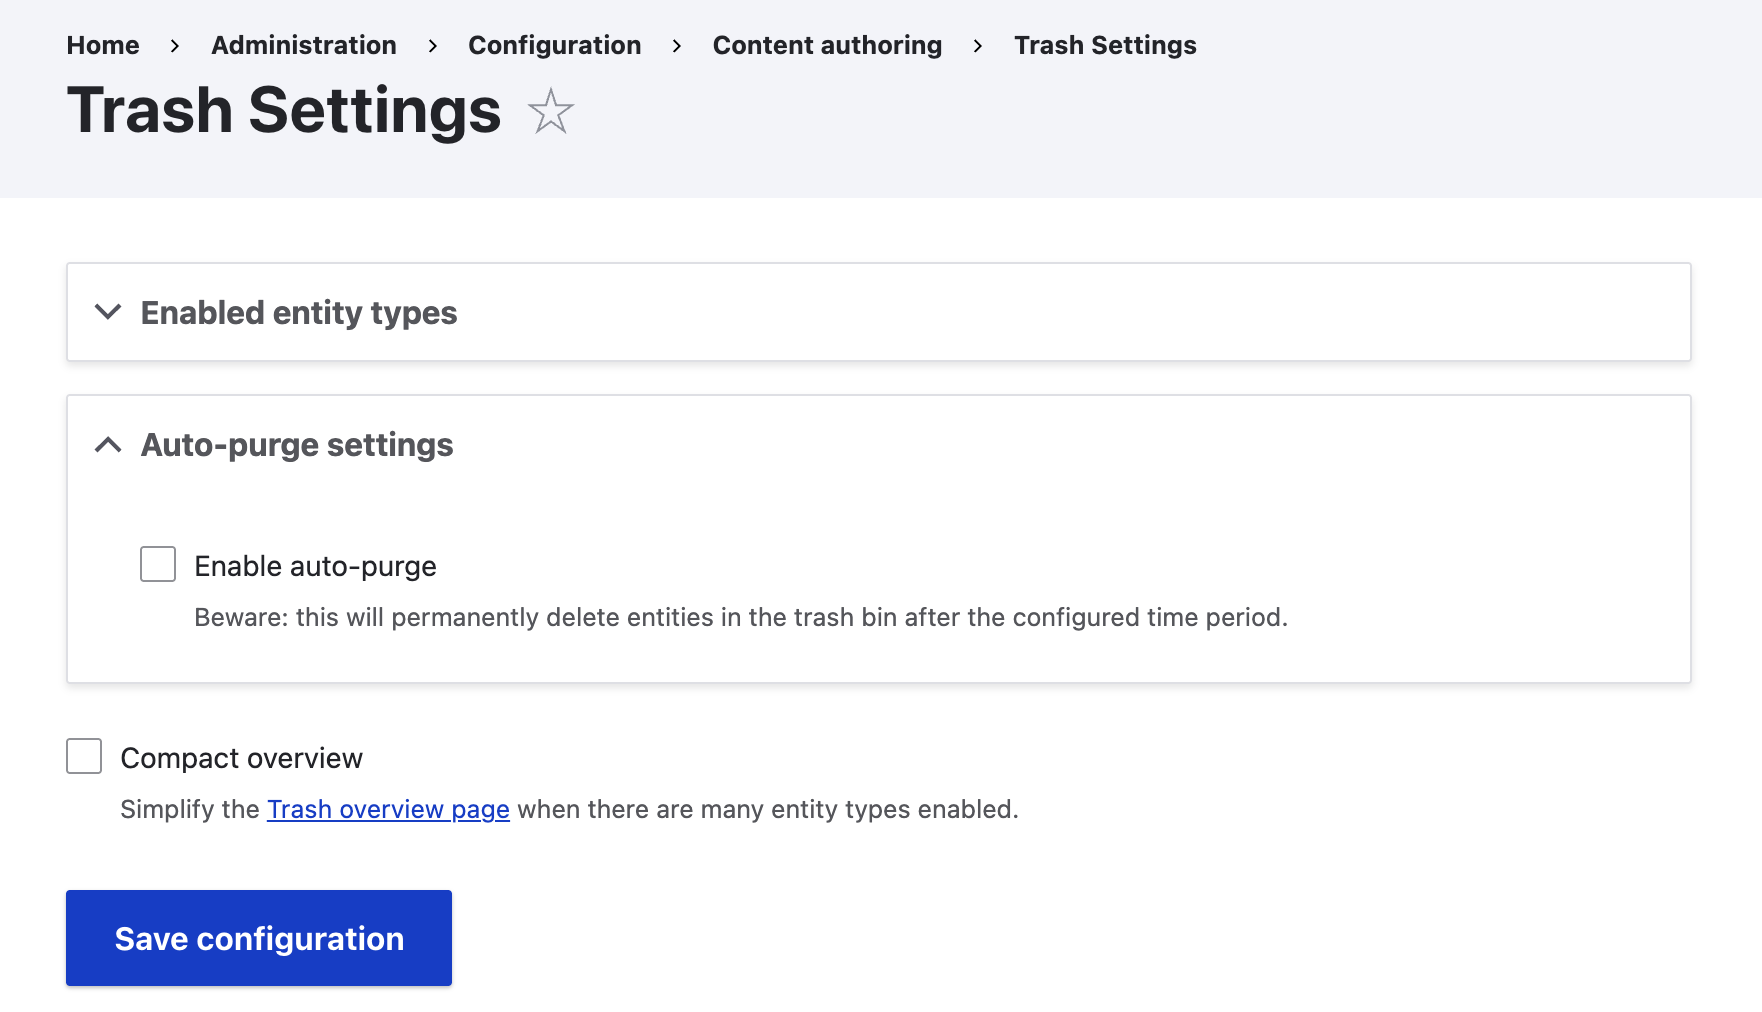
Configuration
To configure the Trash module:
- Navigate to Configuration > Content authoring > Trash (
/admin/config/content/trash) - Configure the following settings:
Entity Type Selection
Enable trash support for specific entity types:
- Content (nodes) - Enabled by default
- Media entities
- Taxonomy terms
- Other content entities
Retention Period
Set how long content remains in trash before automatic purging:
- Default: 30 days
- Can be customized based on your organization’s needs
- Set to 0 to disable automatic purging
Automatic Purging
Configure automatic cleanup via cron:
- Runs periodically to check for expired items
- Items older than the retention period are permanently deleted
- Can be triggered manually via Drush:
drush trash:purge-expired
Content Preview
When viewing trashed content:
- Click the content title in the Trash view to preview
- Trashed items display with a reddish background
- This visual indicator helps identify content that’s in trash
Important Notes
What Gets Preserved
When content is trashed:
- ✓ All field values
- ✓ Metadata (author, date created, etc.)
- ✓ Entity relationships
- ✓ Revisions
- ✓ Moderation states (if using Content Moderation)
Limitations
- Trash is not a replacement for regular backups
- Trashed content doesn’t appear in entity usage reports
- Some custom code may need updates to work with trashed entities
Best Practices
- Set an appropriate retention period for your organization
- Regularly review trashed content before automatic purging
- Train content editors on restore procedures
- Maintain regular database backups as a safety net
Troubleshooting
Content Not Appearing in Trash
Problem: Deleted content doesn’t appear in the trash view
Solutions:
- Check that the entity type is enabled in Trash configuration
- Verify you have permission to view the trash
- Check if content was purged before you looked
Cannot Restore Content
Problem: Restore button doesn’t work or produces an error
Solutions:
- Verify you have restore permissions
- Check if there are any conflicts with existing content
- Review the error logs at
/admin/reports/dblog
Trash View is Empty
Problem: The trash view shows “No entity types enabled”
Solutions:
- Go to
/admin/config/content/trash - Enable at least one entity type (usually “Content”)
- Save the configuration